From Lightroom to Plugins, Part 25

Home » From Lightroom to Plugins, Part 25

From Lightroom to Plugins, Part 25

Posted in

In Part 24, I discussed my process of developing an eagle image in Lightroom3 (LR3).  (If you’re working in LR4 or LR5, the process is still the same but with a few basic adjustment differences).  Since the last Part 24 article, I have upgraded to LR4, so screen prints you see from now on of LR will be done in LR4.  Operationally, it makes little difference which version you are using.

I got all the way through to the sharpening and noise reduction parts of the process.  I’m now ready to take the image into Photoshop (PS) and from there onto Nik’s Color EFEX Pro 4 (CEP4), for further enhancing of the image.

Update 14Jan2014:  I have added to my arsenal of editing tools since I initially posted this article.  The article can still be helpful when taking into account the adjustments I make to the sample image, so please continue to read the article.  But I did want to bring you up to date on some more tools that can be used to get your images where you want them to be.  It’s normal to update your workflow as you add new tools, which is what I have done in practice.  I’m hoping to do another article in the future on my current workflow describing some of the new tools I have added.  But overall, my workflow hasn’t change a lot–I just have more options to choose from now when I send out the image from Lightroom.  Which plugin(s) I decide to use is dependent entirely on the image I’m working on.

I no longer use Photoshop CS5 as I have moved on to Photoshop CC.  Also, I use Lightroom 5, which is part of Adobe’s photography package that they introduced in late 2013.  I pay a monthly charge to have access to these two programs and their continuous updates.

For plugins to these two programs, I still use Nik Color Efex Pro 4 on just about every photo I process.  But in addition, I have added Dfine 2, HDR Efex Pro 2, Viveza 2, Analog Efex Pro, Silver Efex Pro 2, and Sharpener Pro 3, all part of the complete Suite of Nik software, now owned by Google.  At the moment, these are my most used plugins (some more than others).  After Google acquired this software from Nik, they reduced the price down to about $150 for all of them.  The price used to be $500 so this is a smokin’ deal.  All of these plugins can be accessed directly from either Photoshop or Lightroom.

I have recently added the suite of plugins from OnOne Software: Perfect Batch 8, Perfect BW 8, Perfect Effects 8, Perfect Enhance 8, Perfect Mask 8, Perfect Portrait 8, and Perfect Resize 8.  There was a year-end sale on this complete suite for $100 so I couldn’t pass it up.  I have not yet used the software enough to give you any thoughts on it but I’m sure there will be some of these programs that will come in handy.

Lightroom remains the hub of my workflow.  All raw images get imported into Lightroom and then are sent out to either Photoshop where they are sent on to a plugin, or, images are sent directly from Lightroom to a plugin. Regardless, the images always come back to Lightroom where I then export the finished image to where I need it using one of many Lightroom export presets that I have set up.  

One change I’ve made is that I send each image from PS to Nik’s Dfine 2 for whatever noise reduction the image needs.  This is my first step after I send the image to Photoshop from Lightroom.

The last major step I do on each image is to sharpen the image in Photoshop CC’s Smart Sharpen.  It’s the last thing I do to most of my images.  Adobe has improved Smart Sharpen (in the Filter menu). It does a great job figuring out what needs sharpening and what doesn’t.  For instance, I almost never have to worry about it attempting to sharpen a sky or bokeh background–and this is without making any selections in PS.  It has Amount, Radius, and Reduce Noise sliders.  The Radius slider goes all the way down to .1 pixels, which is useful for an already very sharp image.  All sharpening programs have a slight learning curve because they all have their own ‘feel.’  Smart Sharpen is no different.  I typically use the Radius setting of .2 to .3; the Amount setting anywhere from 200 to 500; and the Reduce Noise setting between about 0 and 20.  But it depends on the image and how sharp it is out of the camera.  Some images require settings outside the above ‘typical’ settings.  Before sending an image to Photoshop, I usually allow Lightroom to do an initial sharpening at about 25 which I think is the default setting–so it’s next to no sharpening at all.

End of update!

I’m fully aware that there are photographers who choose not to “enhance” their photo in programs such as these.  This is one of the great things about being a digital photographer–we can make our own images look however we choose–no matter what anyone else thinks.  I use software tools to make my images look the way I want them to.  If you, the reader, had this same eagle image and were processing it, you might use very different adjustments within these tools than what I am using, resulting in an image that looks completely different from mine.  But the operation of these tools (functionally) is the same for everyone.  My hope is, that no matter how my image ends up, you will learn something about the use of these programs so that they will help you to make your images look just the way you want them.

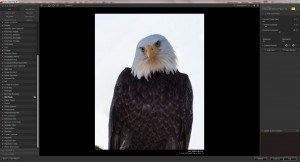
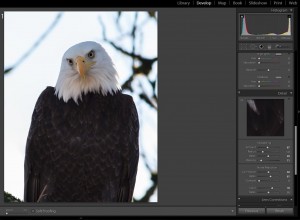
Back to processing image #999, Bald Eagle close up!  Currently, the image is in LR3 and I’ve cropped the image, made some basic adjustments to it, along with sharpening and noise reduction.  If you missed that process, please go back to Processing Images in Lightroom 3, Part 23, and Part 24.  These articles will bring you up to the point where I am now with the image.  Here is the image in LR4 at its current state.

The image is looking better compared to what it did out of the camera.  But, I don’t like those distracting branches in the background.  While LR has a Spot Removal tool that works either as a Cloning or Healing tool, it is not designed to remove large objects such as these branches, efficiently.  This is not to say that it couldn’t be done in LR, but for me, it’s a lot easier in Photoshop (PS).  And, LR makes it easy to open the image directly into PS for editing.

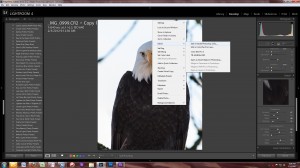
The next step is to right-click on the image in LR.  In the menu choose Edit In, then Edit in Photoshop CS5.


In LR3, a box will pop up and you’ll usually want to choose the top entry that says you want the edited version to go to PS.


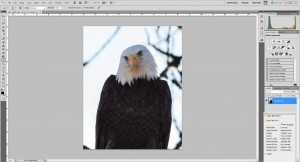
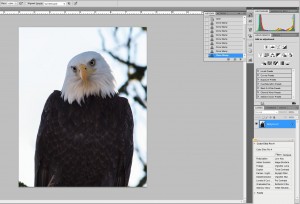
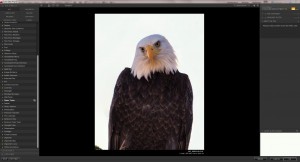
I select, Edit a Copy with Lightroom Adjustments, and Photoshop is opened (if it isn’t arleady), and the image is loaded in Photoshop ready for editing.  The image is the edited version right out of LR4.  Here’s the Photoshop screen print with the image ready to go.

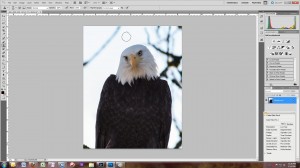
Now I’m ready to remove those unwanted branches from the background.  This will be a relatively easy application using the clone tool.  What makes it easy is that the sky is basically all white and so there is no matching of color gradients or other objects to worry about.  The clone tool is located in the tool bar on the left side of the screen and is the icon circled in the image below.

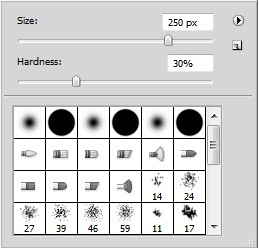
Now that my clone tool is selected, my cursor turns to a “brush.”  It has a certain size and hardness, both of which can be adjusted.  By right-clicking on the image (while the clone tool is selected), a box pops up that looks like this.

It has sliders for size and hardness.  For this project, I’m choosing a 30% hardness and a size of about 3/4 inch in diameter.  This size will, for the most part, fit fairly easily in my somewhat wide open working space which is the sky.  Very little of the trees come in contact with the bird, which makes this a pretty easy clone job.  In addition, the white sky is virtually uniform in color with no color gradients to have to match.  If I did have more of the branches touching the bird, I would need to reduce my brush size and harden its edge for some close up work.

When the clone tool is activated, a tool bar appears across the top of the PS screen so the tool can be customized.  The tools included are Toggle the Brush panel, Toggle the Clone Source panel, Mode, Opacity, Flow, Enable Airbrush Mode, Aligned (or not), and whether to include all layers or not.  Here’s a shot showing the tool bar with clone tool settings.


Some of these I use more than others.

Toggle the Brush panel and Toggle the Clone Source panel:  These two icons, when clicked, display panels giving me the choice of many clone brush presets for textures and also for brush shapes.  I can also change the angle and roundness of the brush.  The Clone Source panel allows me to designate up to five different clone sources in the image simultaneously, making it easy to switch between the five at any time.

Mode Setting:  The drop down menu allows me to choose from about 20 different modes for the Clone brush.  Most of the time I just use normal but I have tried some of the others.  Sometimes I’ll use the Modes, Lighten and Darken.  If the area I want to change is lighter than the surrounding area, I set the Mode to Darken.  The Clone Stamp tool now only affects pixels lighter than the surrounding area.  The Lighten Mode can be used to affect the area in the opposite.  So it’s possible to set the Clone brush to selectively affect just certain pixels.

Opacity:  This control limits how transparent the resulting brush stroke will be.  If I set the Opacity to 50% and clone a jet black portion of my image the resulting brush stroke will be 50% — a medium gray.

Flow:  Flow determines how fast the ‘paint’ leaves the brush.  It’s kind of analagous to a water faucet handle.  But be aware that the Opacity setting overrides any Flow setting.

It’s important to understand that a single brush stroke in Opacity Mode in Photoshop is one where I click once, hold the mouse button down, and drag the brush.  As long as I keep the mouse button down, no matter how many swipes of the brush I do in one area, no more than 50% Opacity will result if the Opacity is set to 50%.  If, after the first brush stroke, I let up on the mouse button and then click and hold it for the second time, this next brush stroke will apply 50% of the first stroke’s Opacity on top of the first stroke.  So if the Clone source area was jet black, I’ll have 50% of black with the first stroke, plus 50% of the first stroke’s gray on top of that with the second stroke, for a total of 75% of the original jet black Clone source.

This is NOT the case with the Flow control.  If I set Flow to 40% (assuming Opacity is set to 100%), my first single brush stroke will lay down 40% of the paint, and if I keep the mouse button down and move the brush back over the first painted stroke, the brush will add another 40% on top of the first stroke (up to the limit of the Opacity setting, which overrides Flow).  The best way to understand this is to try these modes out for yourself and experience how they behave.

Airbrush Mode:  This works as the name implies.  It is controlled by Opacity and Flow and is cumulative even on the same brush stroke.  If you paint with a can of spray paint, each back and forth motion adds another layer of paint.

Aligned:  There’s a box to the left of this word at the top of the screen.  When I check the box, the Clone source brush moves or follows my Clone brush if I merely move the Clone brush with my mouse.  If I uncheck the Aligned box, the Clone source brush will stay at the point I set it no matter where on the image I move the Clone brush.  The Clone source brush will move only if I click and drag the Clone brush over an area of the image.

I use both Aligned and non-Aligned a lot.  For instance, I’ll use the Clone tool in non-Aligned mode when I’m fixing a bird’s eye that has been discolored by a flash (kind of like red eye).  Typically, the discolored part of the eye is in the bird’s pupil where it has a bluish-purple color and maybe a second catch light that I don’t want.  My goal is to restore the pupil to a black or almost black color except for the natural catch light that is already there.

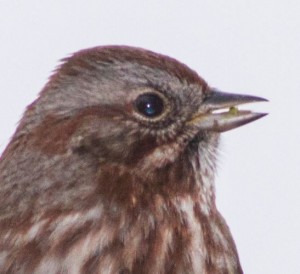
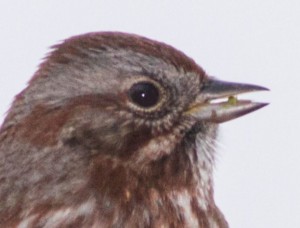
Below is an unprocessed shot of a sparrow, which was taken with flash.  The eye has been discolored by the light from the flash and can be corrected with the Clone tool.  It happens that in this picture, I have a ‘lot’ of the black eye color I can use as a Clone source, right in the bird’s eye.  Some birds’ eyes are so badly discolored from flash that I have to go to another dark part of the image to set my Clone source.  Here though, I’ll set my Clone brush size very small and with some softness, so that when I clone the black, I don’t see the harsh circular edges from the Clone brush in the cloned area.  I also make sure Opacity and Flow is set to 100% because I want the new cloned area to be just as black as the source area.  Here’s the unprocessed close up of a sparrow with a discolored eye.


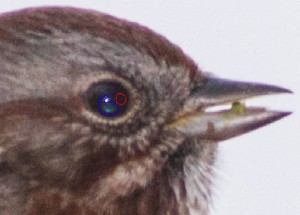
The next picture shows where I set my small, soft Clone source brush (in red) and where I will clone that almost black color to the area enclosed by the blue line.  I will set the Align mode to non-Aligned because I don’t want the Clone source to move–I want it to stay on that black color when I move my mouse.  If it moved, it would begin to pick up the light tan eye-ring colors and I certainly don’t want that.  When I actually do the cloning, I do it in “one-click” steps–I don’t drag the brush because the Clone source will move if I do.  It’s too close to other undesirable colors in this picture.  I’ll start at one edge of the area I want to fix, move the Clone brush over that area, click once, move the brush again just overlapping the last clone a little, click again once, move the brush again, click once, etc., until the area that needs fixing is filled in with the correct color.  I want to take care not to disturb the catch light pixels.

Below is the photo with the eye corrected.  I found it was helpful in this instance to adjust my brush even smaller for some of the clone work since the eye is such a small working area.


Sometimes, I’ll use the Clone tool in Aligned mode when I have a pattern or color gradient I want to clone to another part of the image and I need these to match.

The last setting on the Photoshop tool bar located at the top of the screen in Clone tool mode is a setting to include all layers or not.  I generally just leave this set to Current Layer.  I haven’t run into a situation where I wanted to Clone onto separate layers simultaneously.

Cloning out the branches in the eagle shot..

Now, I want to get back to the eagle image and cloning out those branches.

The image below shows  my PS screen with a crude red circle (I drew) that depicts where I set my Clone source.  My first branch to remove is the diagonal one at the top left corner.  With my clone brush placed at the location of the red circle I hold the ALT key down as I left-click my mouse once.  That locks in the Clone source.  Now with the Clone brush, I position the brush over the top part of the branch and just drag it over the branch downward.  I’m in Aligned mode here so the Clone source follows my brush diagonally down the branch replacing it with white sky.


Here’s the image in PS with the diagonal branch gone.  Now, I can use any of the top left area to clone over the remaining branches.  I’ll set my Clone source near the center of the white area at the top left of the picture.  In short strokes, I’ll paint over all the remaining branches on the right side of the photo.

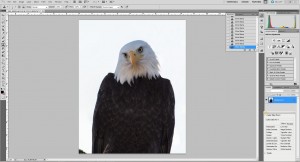
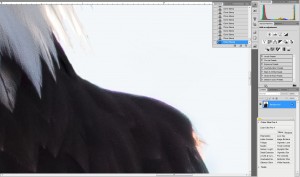
Here’s the image with all the branches removed.  There was actually some light discoloration (I noticed after zooming in) extending down from the bird’s left shoulder along the wing for a few inches.  And, there was a tricky spot at the bird’s left shoulder where the white feathers meet the dark feathers.  I had to reduce the Clone brush way down in size to get between the verticle white feathers that had branches behind them.  I cloned white sky in between and around the individual feathers.

Take a look at this close up.

Purple Fringing

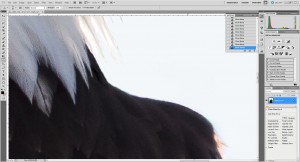
I’ve removed the bluish cast that touched the wing feathers and shoulder feathers by changing the brush to a harder edge and also making it smaller so I could control it easier.  The harder brush edge kept me from unintentionally lightening the edge of the bird’s dark feathers with a large feathered brush.  If you enlarge the above screen shot by clicking on it, you’ll be able to see a slight amount of purple fringing on the bird’s neck and shoulder.  (Purple fringing occurs many times in back lit situations).  I can change the purple to brown by setting the 100% Opacity Clone tool to non-Aligned, and sizing the brush very small–not more than a couple pixels in width.  I also want the brush to have a medium-hard edge.

If you look closely at the zoomed screen shot, you can see that there are about 2 to 3 rows of purple pixels along the bird’s edge at the shoulder–hence, the very small brush.  I’m zoomed into the image to about 500% so I can see the individual pixels.  I place my Clone source anywhere on the bird’s brown feathers.  I then hold the Clone brush over the purple/blue colored pixels and click a bunch of single clicks as I move the brush slowly over each purple pixel.  If I find that the pixels are too dark brown and they aren’t matching well with the other brown pixels around them, I can lower the Opacity to say 50 – 60%.  Then when I do my single clicks, each first click is a lighter brown and the color darkens with each successive click.  It may take more than one or two clicks on a single pixel to get it to the right shade of brown, but it’s in my control and I can make it blend nicely.  If the resulting feather edge is more jagged than the rest of the bird, I just click on my Blur tool with about 10% strength and run a small brush over the edge to blur it just a bit.  I also want to be sure I save my image so I don’t lose my work if the power goes out.  The screen shot below shows the purple fringing cleaned up.


LR4/LR5 does have a defringing tool that works sometimes.  In Lightroom, go to the Lens Corrections area and choose Color.  This is the Defringe tool.   For the purple hue we want to remove, use the Purple Hue sliders (as opposed to the Green Hue sliders).  Move the Amount slider to the right to around 10 as a starting point.  Adjust the Purple Hue sliders (there are 2) until you see the purple in your shot start to go away.  Be sure it doesn’t affect any other edges.  I’ve had some luck with this but in some cases, it hasn’t helped a lot.  Could be I am not operating the tool correctly.  But it’s worth a try if you haven’t used it yet.

Another method you can use in Photoshop is to make a general selection of the area that has the purple fringing using the lasso tool.  Then go to Image/Adjustments/Hue-Saturation, click on the down arrow that is next to Master and, for purple, select blues then slide the Saturation slider to the left to remove blues within the selected area.  Don’t move the slider any further than you need to.  Since the fringing was purple, now there may be some reds that need to be de-saturated.  Go back into the Hue-Saturation box and choose reds, then reduce the saturation level to the point where the purple color is no longer an issue.  One problem with this method is if there are some blues in the selected area that you do not want to de-saturate–like a blue sky, for instance–you’d have to make your selection a LOT more precise so the sky was not affected.

Now, I’ve got a fairly clean image of a beautiful bird with a white, drab background–many times referred to as a high-key image.  Not that all high-key images are bad, but for this one I feel there is just too much pure white in the sky around the bird.  I want to take the image into my Photoshop (and LR4) plugin, Nik’s Color EFEX Pro 4 (CEP4), which is an amazing filter program.  For those new to Photoshop, CEP4 does not come with Photoshop.  I purchased it separately and upon installation of the program onto my computer, it loads as a plugin to Photoshop (and to LR4), making it available to seamlessly open from within Photoshop’s menu system.

[UPDATE 9January2013:  I have since added the entire suite of Nik programs to my post-processing arsenal.  These include Dfine (noise reduction), Viveza (correct colors, contrast, brightness, etc.), Color Efex Pro 4, Silver Efex Pro 2 (black & white editing), and Sharpener Pro.  I certainly have a way to go to master these programs but the control point feature in each is so easy and powerful to use, it’s a great set of programs to have. ]

[Update 13May2014:  A while back, Google acquired the Nik program suite and is selling it for much less than it was under Nik.  I highly recommend it as part of a complete workflow.


Recall from Part 23 in this series that this image originated as a RAW file in Lightroom.  I did adjustments on it there and chose the command in Lightroom to edit the image in Photoshop.  The image was sent to Photoshop as a full-sized TIF image at 300ppi.  If you’re unfamiliar with the TIF image format, please see my article, JPG or RAW Format?, Part 10.  I removed the unsightly branches from the background using the Clone tool.  Now I want to give the image a little more life (in my opinion!) by taking it into CEP4.

To do this, I just click the Filter menu in PS, then choose Nik Software, then Color EFEX Pro 4.  Alternatively, I can invoke CEP4 through CEP4’s Selective Tool panel that appears in Photoshop (unless I set it to not appear).

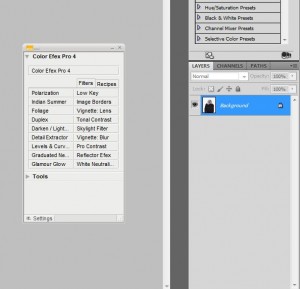
Here’s what the CEP4 Selective Tool panel looks like with just CEP4 installed.

The panel lists the specific filter names that I have chosen as favorites in CEP4.  It also has a tab for Recipes that I have saved in CEP4.  A recipe is a set of stacked filters that I created to enhance a previous image.  At the time, the combination of filters turned out to be something I wanted to save and have available to apply to a future image.  If I click one of the filter names in this Selective Tool panel, CEP4 will open with the image loaded and the selected filter also loaded.

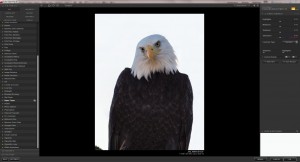
I want to open the eagle image in CEP4.  I’m choosing to do it by clicking the Color EFEX Pro button on the CEP4 Selective Tool panel.  Before the image is actually opened in CEP4, a new layer is created in Photoshop so that any changes I make in CEP4 will not affect the original layer in Photoshop.  Here is the image now open in CEP4.

The left side of the screen is where all the filters and recipes can be listed.  The right side of the screen shows which filter is currently active and, if I had multiple filters already activated for this image, it would show the name of each one and the order in which they each affect the image.  In the screen shot, the filter named Tonal Contrast is active.  I think this particular filter was activated because it was the last one I used.

In the real world I would probably spend some time trying out a bunch of the filters and then settle on ones that I liked.  In fact, that is what I did with this image when I processed it originally.  But for purposes of this article, I know which filters will give me the look I want because I saved them earlier in a Recipe.

The first filter I want to apply to this image is the Pro Contrast filter.  So I go to the list on the left and click the filter name.  The filter is activated and appears on the right side of the screen with some default slider settings.  I adjust the sliders and settle on the following for the Pro Contrast filter.

This filter has given much more detail and punch to the feathers, especially the brown feathers (compare it to the previous screen shot).  Now I click the Add Filter button underneath the active Pro Contrast filter.  This saves that filter and its settings and prepares the image to receive another filter.  The Pro Contrast filter is still available to edit at anytime.  The next filter I want to activate is the Skylight filter.  I go to the list on the left and click on it.  This filter has just one slider–Strength.  This filter adds a warm light to the image–as the slider is moved to the right, the light gets warmer.  I stop at 29 on the slider, which casts a very slight warm glow to the white feathers under the bill.  Here is the screen shot after the Skylight Filter is added.

I have one more filter I want to add to the stack, so I again click in the filter list and now choose Vignette: Lens.  As you can see below, the filter added a slight vignette to the image, breaking up the all white sky a little bit and making it a little less distracting.  The Vignette: Lens filter also is set to add a vignette to the bottom of the image where it hides a little of the feather detail way down low.  But it’s such a small percentage of the breast and wing feathers that I don’t think it detracts from the image.  I wanted to keep all four corners vignetted approximately equally.

To me, the image is improved over the way it was coming out of Lightroom.  I think the changes I made are quite subtle.  It’s so very easy to go crazy with image enhancement software such as CEP4, and even PS and LR4.  There are a gazillion actions and presets that can be downloaded for PS and LR4, that can do similar things that CEP4 does.  But I’m really sold on the power and flexibility of this program.  I’d like to touch on some of the other features of the program that I didn’t need to use in the eagle image.


A few other features of CEP4

I’m a true fan of CEP4.  Here are some other neat things about it that I didn’t get to use in the eagle image processing.  If you look up at the last screen shot, on the right side of the screen, it lists the three filters I chose to use, out of 55 total filters.  I can now save these three filters and their settings as a Recipe by clicking the Save Recipe button.  It then lets me give the Recipe a name and saves it as a custom Recipe.  There are Recipes that come with the program and I can also download Recipes from the Internet.  I can also export Recipes to, and import Recipes from, other users of CEP4.

In addition, on the left side of the CEP4 screen, I can open the History tab where every adjustment I made is recorded, not unlike Photoshop and LR4 do.

A quite powerful feature that I didn’t use on the eagle image are the availability of Control Points in CEP4.  Control Points are CEP4’s way of selecting portions of the image to either add a filter effect to or take it away from the image.  There are + Control Points and – Control Points.  The plus Control Points add the filter effect to just the area of the image I choose.  The minus Control Point removes the filter effect from the portion of the image I choose.

For instance, on the Skylight filter used above in the eagle shot, had I not wanted the warm light on the bird’s white feathers, but instead wanted to keep the effect on the rest of the image, I only have to click on the – (minus) Control Point icon, then move my cursor to the eagle’s neck area on the image, the effect will be deleted from that area.  The area that the deletion affects can be controlled by adjusting a slider on the Control Point which changes the size of the circular selection area.

I have drawn a crude blue circle to represent the approximate position of the minus Control Point’s selection area that I want it to consider when deleting the effect.  The circle size is adjustable by moving one of the sliders on the Contol Point itself, which is visible in the screen shot.  There is a second slider attached to the Control Point that I can adjust for Opacity.  If I set this Control Point Opacity slider to 50%, then the eagle’s head would receive only 50% of the Skylight Filter effect (taking into account my settings for the filter), and the rest of the image will be getting 100% of the effect.  This flexibility for applying filters at different strengths to different parts of the image makes CEP4 a great tool.  The above screen shot shows the minus Control Point applied at 100% Opacity so that the warm light on this area of the image is now gone.

The + (plus) Control Points add the effect to certain portions of the image without affecting the rest of the image.  You can use combinations of both control points in the same image and as many Control Points as you want or need.

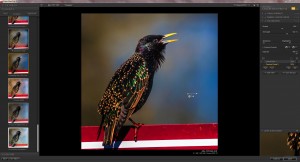
I can also expand the Control Point panel and reveal some other cool features about the ones I’ve placed on my image.  Here is a shot of a Starling where I activated and stacked 3 filters–Tonal Contrast, Darken/Lighten Center, and Polarization.

Let’s say I’m not happy with the darker blue sky that the Polarization filter caused and I want to at least partially undo the filter’s effect on the blue sky.  I click the minus Control Point icon on the right and place it just to the right of the bird’s bill.  I adjust the slider on the control point that changes the circular selection area so that it only includes sky.  I place a second minus Control Point below that, which you can see in the above screen shot.  Only one point shows at a time and I can’t take a screen shot of both.  But imagine there is another minus Control Point (CP) just above the one that is visible.

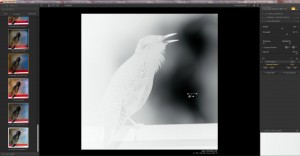
It’s difficult to show here but I can turn each CP on and off to see the effects they are having on the image.  I do this by checking and unchecking the boxes next to the CP numbers, which you can see in the screen shot.  Additionally, I can look at the effects of these two CP’s by checking the boxes on the right side of each CP number.  As I check these, the image turns into a negative b&w image.  I can clearly see the effect of minusing out the Polarization filter by noting the black areas of the b&w image.  The blacker the area, the more the effect was removed.  Here’s the same image in this b&w mode.

If I slide the Opacity slider connected to each of the CP’s, the black area lessens as I approach zero Opacity.  So I have a couple of ways of seeing the effects that CP’s add and subtract from the image.

Another feature of the program is I can re-order the filters I have used on the eagle shot if I want to.  When looking at the above Starling screen shot, you can see there are 3 filters I used for this image, Tonal Contrast, Darken/Lighten Center, and Polarization.  If I wanted to, I could drag the Tonal Contrast filter down under the Polarization filter, making the Darken/Lighten Center filter the top filter.  The order the filters are applied can make a big difference in the way they affect the image.  If I don’t like this order, I can move it right back the way it was.

A super cool feature of the program has to do with the Brush button at the bottom-right of the screen.  [This only applies to Nik plug ins that are meant to work with Photoshop–not the Lightroom version!]  This button only shows up when CEP4 is opened from within Photoshop.  Say I create a stack of filters that I want to apply to just a certain portion of the image.  I can click the Brush button in CEP4, and CEP4 will close and revert back to Photoshop with the image loaded and none of the stacked filter effects yet applied to the image.  The Brush tool is automatically activated in Photoshop.  Now I can adjust the brush size and hardness, and begin painting the stacked filter effect from CEP4 onto my image in Photoshop, just where I want the effect to be.

True, I could use Control Points in CEP4 to accomplish a similar thing but using a brush to paint on the effect in specific areas is probably a little more accurate which can make a difference in some images.  Which tool I use needs to fit the requirements of the task at hand.

Finishing the Eagle Picture..

I need to do a few more things to get my finished eagle picture closed out of CEP4 and Photoshop.  In CEP4, once I’m done applying filters to the eagle, I save any Recipes I want, then I Click the OK button.  CEP4 closes and the image in Photoshop is updated with my filter changes applied in CEP4.  If I needed to, I could do more work on the image in Photoshop but I feel I’m done with this one, so I do a File>Save in Photoshop, which closes the image in Photoshop and updates the processed TIF photo to LR4 in the filmstrip.  So now I have the image version the way it was before it left LR4 and also the new updated ‘finished’ version back in LR4 the way it is now.  This new TIF image is located on my hard drive in the same folder as my RAW images for Feb. 3, 2012.  It was actually created there when I sent the image to Photoshop from LR4.  The image had also been added to the LR4 catalog at that time.

Recall back in Part 23 of this series, where I began the major processing of this eagle image in LR3.  I also had selected two other eagle images from the same group of shots with different poses.  I want to make the other two poses similar in processing to the one I just did, image 999.

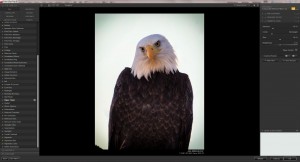
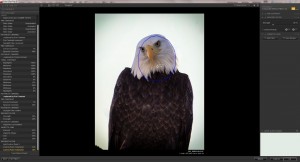
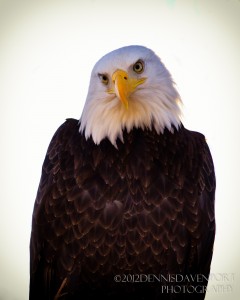
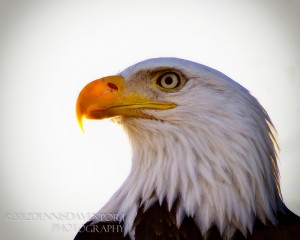
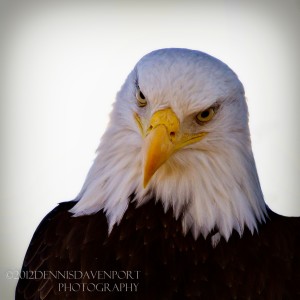
The first step is to be sure all the LR4 adjustments I made to image 999 are copied over to the other two images, 908 and 915, since all three images were taken under similar lighting circumstances.  It’s easy to do this in LR4 since all I have to do is select image 999 in the filmstrip, then add 908 and 915 to the selections, then click the Sync Button, make sure all the adjustments I want to Sync are checked in the list that pops up, then click Synchronize.  Images 908 and 915 will now have taken on the adjustment properties of image 999.  I won’t just assume they are the best they can be though.  I’ll double check to see if they are sharpened properly and lighting, contrast, etc., are similar to #999.  Doing the synchronization in LR4 gets them real close to image 999.  Once images 908 and 915 are adjusted where I want them, I send them to CEP4 directly or via Photoshop, and apply the Recipe I saved from the processing of image 999.  I tweak any sliders I need to in the 3 filters for that Recipe and click OK in CEP4 to bring the finished product back to LR4.  The same is done for the third image and I now have three eagle shots that look relatively similar in processing and, I hope, better than they did before we started.  Here are the three finished images:


While these images weren’t the most labor-intensive images to do post-processing on, I hope this article has given you an idea of what a typical image of mine goes through before it is seen by the public.  Each photographer must decide how much or how little post-processing they want to do on their own images.

I’ll finish up the Digital Bird Photography with one more article covering getting images onto the web.  I also hope to write an article about Lightroom 4 and highlight some of the changes and additions that are in the new release.  Looking forward to seeing you for that one!  In the mean time, please check out my latest blog post from my Feb. 3, 2012, photo shoot at Ridgefield NWR.


<<Previous Article                                                                                     Next Article >>

Bird Photography Equipment (1)

DSLR Features for Bird Photography (2)

Memory Cards for Cameras (3)

Lenses for Bird Photography (4)

Bird Photography Accessories (5)

Tripod or Monopod? (6)

More Accessories for Bird Photography (7)

Software Introduction for Bird Photography (8)

Introduction to Capturing Bird Images (9)

JPG or RAW? (10)

Shooting Bird Photos (11)

Camera Exposure Modes (12)

Other Camera Settings and Features (13)

Exif Data (14)

Depth of Field and Aperture (15)

Best Time to Photograph Birds (16)

Composition in Bird Photography (17)

Getting Close in Bird Photography (18)

Backgrounds in Bird Photography (19)

Using External Flash in Bird Photography (20)

Photographing Birds in Flight, 21

Lightroom 3 – The Hub of My Workflow (22)

Processing Images in Lightroom 3 (23)
Processing Images in Lightroom 3 (24)

Using Lightroom to Upload Images (26)

Posted in

In Part 24, I discussed my process of developing an eagle image in Lightroom3 (LR3).  (If you’re working in LR4 or LR5, the process is still the same but with a few basic adjustment differences).  Since the last Part 24 article, I have upgraded to LR4, so screen prints you see from now on of LR will be done in LR4.  Operationally, it makes little difference which version you are using.

I got all the way through to the sharpening and noise reduction parts of the process.  I’m now ready to take the image into Photoshop (PS) and from there onto Nik’s Color EFEX Pro 4 (CEP4), for further enhancing of the image.

Update 14Jan2014:  I have added to my arsenal of editing tools since I initially posted this article.  The article can still be helpful when taking into account the adjustments I make to the sample image, so please continue to read the article.  But I did want to bring you up to date on some more tools that can be used to get your images where you want them to be.  It’s normal to update your workflow as you add new tools, which is what I have done in practice.  I’m hoping to do another article in the future on my current workflow describing some of the new tools I have added.  But overall, my workflow hasn’t change a lot–I just have more options to choose from now when I send out the image from Lightroom.  Which plugin(s) I decide to use is dependent entirely on the image I’m working on.

I no longer use Photoshop CS5 as I have moved on to Photoshop CC.  Also, I use Lightroom 5, which is part of Adobe’s photography package that they introduced in late 2013.  I pay a monthly charge to have access to these two programs and their continuous updates.

For plugins to these two programs, I still use Nik Color Efex Pro 4 on just about every photo I process.  But in addition, I have added Dfine 2, HDR Efex Pro 2, Viveza 2, Analog Efex Pro, Silver Efex Pro 2, and Sharpener Pro 3, all part of the complete Suite of Nik software, now owned by Google.  At the moment, these are my most used plugins (some more than others).  After Google acquired this software from Nik, they reduced the price down to about $150 for all of them.  The price used to be $500 so this is a smokin’ deal.  All of these plugins can be accessed directly from either Photoshop or Lightroom.

I have recently added the suite of plugins from OnOne Software: Perfect Batch 8, Perfect BW 8, Perfect Effects 8, Perfect Enhance 8, Perfect Mask 8, Perfect Portrait 8, and Perfect Resize 8.  There was a year-end sale on this complete suite for $100 so I couldn’t pass it up.  I have not yet used the software enough to give you any thoughts on it but I’m sure there will be some of these programs that will come in handy.

Lightroom remains the hub of my workflow.  All raw images get imported into Lightroom and then are sent out to either Photoshop where they are sent on to a plugin, or, images are sent directly from Lightroom to a plugin. Regardless, the images always come back to Lightroom where I then export the finished image to where I need it using one of many Lightroom export presets that I have set up.  

One change I’ve made is that I send each image from PS to Nik’s Dfine 2 for whatever noise reduction the image needs.  This is my first step after I send the image to Photoshop from Lightroom.

The last major step I do on each image is to sharpen the image in Photoshop CC’s Smart Sharpen.  It’s the last thing I do to most of my images.  Adobe has improved Smart Sharpen (in the Filter menu). It does a great job figuring out what needs sharpening and what doesn’t.  For instance, I almost never have to worry about it attempting to sharpen a sky or bokeh background–and this is without making any selections in PS.  It has Amount, Radius, and Reduce Noise sliders.  The Radius slider goes all the way down to .1 pixels, which is useful for an already very sharp image.  All sharpening programs have a slight learning curve because they all have their own ‘feel.’  Smart Sharpen is no different.  I typically use the Radius setting of .2 to .3; the Amount setting anywhere from 200 to 500; and the Reduce Noise setting between about 0 and 20.  But it depends on the image and how sharp it is out of the camera.  Some images require settings outside the above ‘typical’ settings.  Before sending an image to Photoshop, I usually allow Lightroom to do an initial sharpening at about 25 which I think is the default setting–so it’s next to no sharpening at all.

End of update!

I’m fully aware that there are photographers who choose not to “enhance” their photo in programs such as these.  This is one of the great things about being a digital photographer–we can make our own images look however we choose–no matter what anyone else thinks.  I use software tools to make my images look the way I want them to.  If you, the reader, had this same eagle image and were processing it, you might use very different adjustments within these tools than what I am using, resulting in an image that looks completely different from mine.  But the operation of these tools (functionally) is the same for everyone.  My hope is, that no matter how my image ends up, you will learn something about the use of these programs so that they will help you to make your images look just the way you want them.

Back to processing image #999, Bald Eagle close up!  Currently, the image is in LR3 and I’ve cropped the image, made some basic adjustments to it, along with sharpening and noise reduction.  If you missed that process, please go back to Processing Images in Lightroom 3, Part 23, and Part 24.  These articles will bring you up to the point where I am now with the image.  Here is the image in LR4 at its current state.

The image is looking better compared to what it did out of the camera.  But, I don’t like those distracting branches in the background.  While LR has a Spot Removal tool that works either as a Cloning or Healing tool, it is not designed to remove large objects such as these branches, efficiently.  This is not to say that it couldn’t be done in LR, but for me, it’s a lot easier in Photoshop (PS).  And, LR makes it easy to open the image directly into PS for editing.

The next step is to right-click on the image in LR.  In the menu choose Edit In, then Edit in Photoshop CS5.


In LR3, a box will pop up and you’ll usually want to choose the top entry that says you want the edited version to go to PS.


I select, Edit a Copy with Lightroom Adjustments, and Photoshop is opened (if it isn’t arleady), and the image is loaded in Photoshop ready for editing.  The image is the edited version right out of LR4.  Here’s the Photoshop screen print with the image ready to go.

Now I’m ready to remove those unwanted branches from the background.  This will be a relatively easy application using the clone tool.  What makes it easy is that the sky is basically all white and so there is no matching of color gradients or other objects to worry about.  The clone tool is located in the tool bar on the left side of the screen and is the icon circled in the image below.

Now that my clone tool is selected, my cursor turns to a “brush.”  It has a certain size and hardness, both of which can be adjusted.  By right-clicking on the image (while the clone tool is selected), a box pops up that looks like this.

It has sliders for size and hardness.  For this project, I’m choosing a 30% hardness and a size of about 3/4 inch in diameter.  This size will, for the most part, fit fairly easily in my somewhat wide open working space which is the sky.  Very little of the trees come in contact with the bird, which makes this a pretty easy clone job.  In addition, the white sky is virtually uniform in color with no color gradients to have to match.  If I did have more of the branches touching the bird, I would need to reduce my brush size and harden its edge for some close up work.

When the clone tool is activated, a tool bar appears across the top of the PS screen so the tool can be customized.  The tools included are Toggle the Brush panel, Toggle the Clone Source panel, Mode, Opacity, Flow, Enable Airbrush Mode, Aligned (or not), and whether to include all layers or not.  Here’s a shot showing the tool bar with clone tool settings.


Some of these I use more than others.

Toggle the Brush panel and Toggle the Clone Source panel:  These two icons, when clicked, display panels giving me the choice of many clone brush presets for textures and also for brush shapes.  I can also change the angle and roundness of the brush.  The Clone Source panel allows me to designate up to five different clone sources in the image simultaneously, making it easy to switch between the five at any time.

Mode Setting:  The drop down menu allows me to choose from about 20 different modes for the Clone brush.  Most of the time I just use normal but I have tried some of the others.  Sometimes I’ll use the Modes, Lighten and Darken.  If the area I want to change is lighter than the surrounding area, I set the Mode to Darken.  The Clone Stamp tool now only affects pixels lighter than the surrounding area.  The Lighten Mode can be used to affect the area in the opposite.  So it’s possible to set the Clone brush to selectively affect just certain pixels.

Opacity:  This control limits how transparent the resulting brush stroke will be.  If I set the Opacity to 50% and clone a jet black portion of my image the resulting brush stroke will be 50% — a medium gray.

Flow:  Flow determines how fast the ‘paint’ leaves the brush.  It’s kind of analagous to a water faucet handle.  But be aware that the Opacity setting overrides any Flow setting.

It’s important to understand that a single brush stroke in Opacity Mode in Photoshop is one where I click once, hold the mouse button down, and drag the brush.  As long as I keep the mouse button down, no matter how many swipes of the brush I do in one area, no more than 50% Opacity will result if the Opacity is set to 50%.  If, after the first brush stroke, I let up on the mouse button and then click and hold it for the second time, this next brush stroke will apply 50% of the first stroke’s Opacity on top of the first stroke.  So if the Clone source area was jet black, I’ll have 50% of black with the first stroke, plus 50% of the first stroke’s gray on top of that with the second stroke, for a total of 75% of the original jet black Clone source.

This is NOT the case with the Flow control.  If I set Flow to 40% (assuming Opacity is set to 100%), my first single brush stroke will lay down 40% of the paint, and if I keep the mouse button down and move the brush back over the first painted stroke, the brush will add another 40% on top of the first stroke (up to the limit of the Opacity setting, which overrides Flow).  The best way to understand this is to try these modes out for yourself and experience how they behave.

Airbrush Mode:  This works as the name implies.  It is controlled by Opacity and Flow and is cumulative even on the same brush stroke.  If you paint with a can of spray paint, each back and forth motion adds another layer of paint.

Aligned:  There’s a box to the left of this word at the top of the screen.  When I check the box, the Clone source brush moves or follows my Clone brush if I merely move the Clone brush with my mouse.  If I uncheck the Aligned box, the Clone source brush will stay at the point I set it no matter where on the image I move the Clone brush.  The Clone source brush will move only if I click and drag the Clone brush over an area of the image.

I use both Aligned and non-Aligned a lot.  For instance, I’ll use the Clone tool in non-Aligned mode when I’m fixing a bird’s eye that has been discolored by a flash (kind of like red eye).  Typically, the discolored part of the eye is in the bird’s pupil where it has a bluish-purple color and maybe a second catch light that I don’t want.  My goal is to restore the pupil to a black or almost black color except for the natural catch light that is already there.

Below is an unprocessed shot of a sparrow, which was taken with flash.  The eye has been discolored by the light from the flash and can be corrected with the Clone tool.  It happens that in this picture, I have a ‘lot’ of the black eye color I can use as a Clone source, right in the bird’s eye.  Some birds’ eyes are so badly discolored from flash that I have to go to another dark part of the image to set my Clone source.  Here though, I’ll set my Clone brush size very small and with some softness, so that when I clone the black, I don’t see the harsh circular edges from the Clone brush in the cloned area.  I also make sure Opacity and Flow is set to 100% because I want the new cloned area to be just as black as the source area.  Here’s the unprocessed close up of a sparrow with a discolored eye.


The next picture shows where I set my small, soft Clone source brush (in red) and where I will clone that almost black color to the area enclosed by the blue line.  I will set the Align mode to non-Aligned because I don’t want the Clone source to move–I want it to stay on that black color when I move my mouse.  If it moved, it would begin to pick up the light tan eye-ring colors and I certainly don’t want that.  When I actually do the cloning, I do it in “one-click” steps–I don’t drag the brush because the Clone source will move if I do.  It’s too close to other undesirable colors in this picture.  I’ll start at one edge of the area I want to fix, move the Clone brush over that area, click once, move the brush again just overlapping the last clone a little, click again once, move the brush again, click once, etc., until the area that needs fixing is filled in with the correct color.  I want to take care not to disturb the catch light pixels.

Below is the photo with the eye corrected.  I found it was helpful in this instance to adjust my brush even smaller for some of the clone work since the eye is such a small working area.


Sometimes, I’ll use the Clone tool in Aligned mode when I have a pattern or color gradient I want to clone to another part of the image and I need these to match.

The last setting on the Photoshop tool bar located at the top of the screen in Clone tool mode is a setting to include all layers or not.  I generally just leave this set to Current Layer.  I haven’t run into a situation where I wanted to Clone onto separate layers simultaneously.

Cloning out the branches in the eagle shot..

Now, I want to get back to the eagle image and cloning out those branches.

The image below shows  my PS screen with a crude red circle (I drew) that depicts where I set my Clone source.  My first branch to remove is the diagonal one at the top left corner.  With my clone brush placed at the location of the red circle I hold the ALT key down as I left-click my mouse once.  That locks in the Clone source.  Now with the Clone brush, I position the brush over the top part of the branch and just drag it over the branch downward.  I’m in Aligned mode here so the Clone source follows my brush diagonally down the branch replacing it with white sky.


Here’s the image in PS with the diagonal branch gone.  Now, I can use any of the top left area to clone over the remaining branches.  I’ll set my Clone source near the center of the white area at the top left of the picture.  In short strokes, I’ll paint over all the remaining branches on the right side of the photo.

Here’s the image with all the branches removed.  There was actually some light discoloration (I noticed after zooming in) extending down from the bird’s left shoulder along the wing for a few inches.  And, there was a tricky spot at the bird’s left shoulder where the white feathers meet the dark feathers.  I had to reduce the Clone brush way down in size to get between the verticle white feathers that had branches behind them.  I cloned white sky in between and around the individual feathers.

Take a look at this close up.

Purple Fringing

I’ve removed the bluish cast that touched the wing feathers and shoulder feathers by changing the brush to a harder edge and also making it smaller so I could control it easier.  The harder brush edge kept me from unintentionally lightening the edge of the bird’s dark feathers with a large feathered brush.  If you enlarge the above screen shot by clicking on it, you’ll be able to see a slight amount of purple fringing on the bird’s neck and shoulder.  (Purple fringing occurs many times in back lit situations).  I can change the purple to brown by setting the 100% Opacity Clone tool to non-Aligned, and sizing the brush very small–not more than a couple pixels in width.  I also want the brush to have a medium-hard edge.

If you look closely at the zoomed screen shot, you can see that there are about 2 to 3 rows of purple pixels along the bird’s edge at the shoulder–hence, the very small brush.  I’m zoomed into the image to about 500% so I can see the individual pixels.  I place my Clone source anywhere on the bird’s brown feathers.  I then hold the Clone brush over the purple/blue colored pixels and click a bunch of single clicks as I move the brush slowly over each purple pixel.  If I find that the pixels are too dark brown and they aren’t matching well with the other brown pixels around them, I can lower the Opacity to say 50 – 60%.  Then when I do my single clicks, each first click is a lighter brown and the color darkens with each successive click.  It may take more than one or two clicks on a single pixel to get it to the right shade of brown, but it’s in my control and I can make it blend nicely.  If the resulting feather edge is more jagged than the rest of the bird, I just click on my Blur tool with about 10% strength and run a small brush over the edge to blur it just a bit.  I also want to be sure I save my image so I don’t lose my work if the power goes out.  The screen shot below shows the purple fringing cleaned up.


LR4/LR5 does have a defringing tool that works sometimes.  In Lightroom, go to the Lens Corrections area and choose Color.  This is the Defringe tool.   For the purple hue we want to remove, use the Purple Hue sliders (as opposed to the Green Hue sliders).  Move the Amount slider to the right to around 10 as a starting point.  Adjust the Purple Hue sliders (there are 2) until you see the purple in your shot start to go away.  Be sure it doesn’t affect any other edges.  I’ve had some luck with this but in some cases, it hasn’t helped a lot.  Could be I am not operating the tool correctly.  But it’s worth a try if you haven’t used it yet.

Another method you can use in Photoshop is to make a general selection of the area that has the purple fringing using the lasso tool.  Then go to Image/Adjustments/Hue-Saturation, click on the down arrow that is next to Master and, for purple, select blues then slide the Saturation slider to the left to remove blues within the selected area.  Don’t move the slider any further than you need to.  Since the fringing was purple, now there may be some reds that need to be de-saturated.  Go back into the Hue-Saturation box and choose reds, then reduce the saturation level to the point where the purple color is no longer an issue.  One problem with this method is if there are some blues in the selected area that you do not want to de-saturate–like a blue sky, for instance–you’d have to make your selection a LOT more precise so the sky was not affected.

Now, I’ve got a fairly clean image of a beautiful bird with a white, drab background–many times referred to as a high-key image.  Not that all high-key images are bad, but for this one I feel there is just too much pure white in the sky around the bird.  I want to take the image into my Photoshop (and LR4) plugin, Nik’s Color EFEX Pro 4 (CEP4), which is an amazing filter program.  For those new to Photoshop, CEP4 does not come with Photoshop.  I purchased it separately and upon installation of the program onto my computer, it loads as a plugin to Photoshop (and to LR4), making it available to seamlessly open from within Photoshop’s menu system.

[UPDATE 9January2013:  I have since added the entire suite of Nik programs to my post-processing arsenal.  These include Dfine (noise reduction), Viveza (correct colors, contrast, brightness, etc.), Color Efex Pro 4, Silver Efex Pro 2 (black & white editing), and Sharpener Pro.  I certainly have a way to go to master these programs but the control point feature in each is so easy and powerful to use, it’s a great set of programs to have. ]

[Update 13May2014:  A while back, Google acquired the Nik program suite and is selling it for much less than it was under Nik.  I highly recommend it as part of a complete workflow.


Recall from Part 23 in this series that this image originated as a RAW file in Lightroom.  I did adjustments on it there and chose the command in Lightroom to edit the image in Photoshop.  The image was sent to Photoshop as a full-sized TIF image at 300ppi.  If you’re unfamiliar with the TIF image format, please see my article, JPG or RAW Format?, Part 10.  I removed the unsightly branches from the background using the Clone tool.  Now I want to give the image a little more life (in my opinion!) by taking it into CEP4.

To do this, I just click the Filter menu in PS, then choose Nik Software, then Color EFEX Pro 4.  Alternatively, I can invoke CEP4 through CEP4’s Selective Tool panel that appears in Photoshop (unless I set it to not appear).

Here’s what the CEP4 Selective Tool panel looks like with just CEP4 installed.

The panel lists the specific filter names that I have chosen as favorites in CEP4.  It also has a tab for Recipes that I have saved in CEP4.  A recipe is a set of stacked filters that I created to enhance a previous image.  At the time, the combination of filters turned out to be something I wanted to save and have available to apply to a future image.  If I click one of the filter names in this Selective Tool panel, CEP4 will open with the image loaded and the selected filter also loaded.

I want to open the eagle image in CEP4.  I’m choosing to do it by clicking the Color EFEX Pro button on the CEP4 Selective Tool panel.  Before the image is actually opened in CEP4, a new layer is created in Photoshop so that any changes I make in CEP4 will not affect the original layer in Photoshop.  Here is the image now open in CEP4.

The left side of the screen is where all the filters and recipes can be listed.  The right side of the screen shows which filter is currently active and, if I had multiple filters already activated for this image, it would show the name of each one and the order in which they each affect the image.  In the screen shot, the filter named Tonal Contrast is active.  I think this particular filter was activated because it was the last one I used.

In the real world I would probably spend some time trying out a bunch of the filters and then settle on ones that I liked.  In fact, that is what I did with this image when I processed it originally.  But for purposes of this article, I know which filters will give me the look I want because I saved them earlier in a Recipe.

The first filter I want to apply to this image is the Pro Contrast filter.  So I go to the list on the left and click the filter name.  The filter is activated and appears on the right side of the screen with some default slider settings.  I adjust the sliders and settle on the following for the Pro Contrast filter.

This filter has given much more detail and punch to the feathers, especially the brown feathers (compare it to the previous screen shot).  Now I click the Add Filter button underneath the active Pro Contrast filter.  This saves that filter and its settings and prepares the image to receive another filter.  The Pro Contrast filter is still available to edit at anytime.  The next filter I want to activate is the Skylight filter.  I go to the list on the left and click on it.  This filter has just one slider–Strength.  This filter adds a warm light to the image–as the slider is moved to the right, the light gets warmer.  I stop at 29 on the slider, which casts a very slight warm glow to the white feathers under the bill.  Here is the screen shot after the Skylight Filter is added.

I have one more filter I want to add to the stack, so I again click in the filter list and now choose Vignette: Lens.  As you can see below, the filter added a slight vignette to the image, breaking up the all white sky a little bit and making it a little less distracting.  The Vignette: Lens filter also is set to add a vignette to the bottom of the image where it hides a little of the feather detail way down low.  But it’s such a small percentage of the breast and wing feathers that I don’t think it detracts from the image.  I wanted to keep all four corners vignetted approximately equally.

To me, the image is improved over the way it was coming out of Lightroom.  I think the changes I made are quite subtle.  It’s so very easy to go crazy with image enhancement software such as CEP4, and even PS and LR4.  There are a gazillion actions and presets that can be downloaded for PS and LR4, that can do similar things that CEP4 does.  But I’m really sold on the power and flexibility of this program.  I’d like to touch on some of the other features of the program that I didn’t need to use in the eagle image.


A few other features of CEP4

I’m a true fan of CEP4.  Here are some other neat things about it that I didn’t get to use in the eagle image processing.  If you look up at the last screen shot, on the right side of the screen, it lists the three filters I chose to use, out of 55 total filters.  I can now save these three filters and their settings as a Recipe by clicking the Save Recipe button.  It then lets me give the Recipe a name and saves it as a custom Recipe.  There are Recipes that come with the program and I can also download Recipes from the Internet.  I can also export Recipes to, and import Recipes from, other users of CEP4.

In addition, on the left side of the CEP4 screen, I can open the History tab where every adjustment I made is recorded, not unlike Photoshop and LR4 do.

A quite powerful feature that I didn’t use on the eagle image are the availability of Control Points in CEP4.  Control Points are CEP4’s way of selecting portions of the image to either add a filter effect to or take it away from the image.  There are + Control Points and – Control Points.  The plus Control Points add the filter effect to just the area of the image I choose.  The minus Control Point removes the filter effect from the portion of the image I choose.

For instance, on the Skylight filter used above in the eagle shot, had I not wanted the warm light on the bird’s white feathers, but instead wanted to keep the effect on the rest of the image, I only have to click on the – (minus) Control Point icon, then move my cursor to the eagle’s neck area on the image, the effect will be deleted from that area.  The area that the deletion affects can be controlled by adjusting a slider on the Control Point which changes the size of the circular selection area.

I have drawn a crude blue circle to represent the approximate position of the minus Control Point’s selection area that I want it to consider when deleting the effect.  The circle size is adjustable by moving one of the sliders on the Contol Point itself, which is visible in the screen shot.  There is a second slider attached to the Control Point that I can adjust for Opacity.  If I set this Control Point Opacity slider to 50%, then the eagle’s head would receive only 50% of the Skylight Filter effect (taking into account my settings for the filter), and the rest of the image will be getting 100% of the effect.  This flexibility for applying filters at different strengths to different parts of the image makes CEP4 a great tool.  The above screen shot shows the minus Control Point applied at 100% Opacity so that the warm light on this area of the image is now gone.

The + (plus) Control Points add the effect to certain portions of the image without affecting the rest of the image.  You can use combinations of both control points in the same image and as many Control Points as you want or need.

I can also expand the Control Point panel and reveal some other cool features about the ones I’ve placed on my image.  Here is a shot of a Starling where I activated and stacked 3 filters–Tonal Contrast, Darken/Lighten Center, and Polarization.

Let’s say I’m not happy with the darker blue sky that the Polarization filter caused and I want to at least partially undo the filter’s effect on the blue sky.  I click the minus Control Point icon on the right and place it just to the right of the bird’s bill.  I adjust the slider on the control point that changes the circular selection area so that it only includes sky.  I place a second minus Control Point below that, which you can see in the above screen shot.  Only one point shows at a time and I can’t take a screen shot of both.  But imagine there is another minus Control Point (CP) just above the one that is visible.

It’s difficult to show here but I can turn each CP on and off to see the effects they are having on the image.  I do this by checking and unchecking the boxes next to the CP numbers, which you can see in the screen shot.  Additionally, I can look at the effects of these two CP’s by checking the boxes on the right side of each CP number.  As I check these, the image turns into a negative b&w image.  I can clearly see the effect of minusing out the Polarization filter by noting the black areas of the b&w image.  The blacker the area, the more the effect was removed.  Here’s the same image in this b&w mode.

If I slide the Opacity slider connected to each of the CP’s, the black area lessens as I approach zero Opacity.  So I have a couple of ways of seeing the effects that CP’s add and subtract from the image.

Another feature of the program is I can re-order the filters I have used on the eagle shot if I want to.  When looking at the above Starling screen shot, you can see there are 3 filters I used for this image, Tonal Contrast, Darken/Lighten Center, and Polarization.  If I wanted to, I could drag the Tonal Contrast filter down under the Polarization filter, making the Darken/Lighten Center filter the top filter.  The order the filters are applied can make a big difference in the way they affect the image.  If I don’t like this order, I can move it right back the way it was.

A super cool feature of the program has to do with the Brush button at the bottom-right of the screen.  [This only applies to Nik plug ins that are meant to work with Photoshop–not the Lightroom version!]  This button only shows up when CEP4 is opened from within Photoshop.  Say I create a stack of filters that I want to apply to just a certain portion of the image.  I can click the Brush button in CEP4, and CEP4 will close and revert back to Photoshop with the image loaded and none of the stacked filter effects yet applied to the image.  The Brush tool is automatically activated in Photoshop.  Now I can adjust the brush size and hardness, and begin painting the stacked filter effect from CEP4 onto my image in Photoshop, just where I want the effect to be.

True, I could use Control Points in CEP4 to accomplish a similar thing but using a brush to paint on the effect in specific areas is probably a little more accurate which can make a difference in some images.  Which tool I use needs to fit the requirements of the task at hand.

Finishing the Eagle Picture..

I need to do a few more things to get my finished eagle picture closed out of CEP4 and Photoshop.  In CEP4, once I’m done applying filters to the eagle, I save any Recipes I want, then I Click the OK button.  CEP4 closes and the image in Photoshop is updated with my filter changes applied in CEP4.  If I needed to, I could do more work on the image in Photoshop but I feel I’m done with this one, so I do a File>Save in Photoshop, which closes the image in Photoshop and updates the processed TIF photo to LR4 in the filmstrip.  So now I have the image version the way it was before it left LR4 and also the new updated ‘finished’ version back in LR4 the way it is now.  This new TIF image is located on my hard drive in the same folder as my RAW images for Feb. 3, 2012.  It was actually created there when I sent the image to Photoshop from LR4.  The image had also been added to the LR4 catalog at that time.

Recall back in Part 23 of this series, where I began the major processing of this eagle image in LR3.  I also had selected two other eagle images from the same group of shots with different poses.  I want to make the other two poses similar in processing to the one I just did, image 999.

The first step is to be sure all the LR4 adjustments I made to image 999 are copied over to the other two images, 908 and 915, since all three images were taken under similar lighting circumstances.  It’s easy to do this in LR4 since all I have to do is select image 999 in the filmstrip, then add 908 and 915 to the selections, then click the Sync Button, make sure all the adjustments I want to Sync are checked in the list that pops up, then click Synchronize.  Images 908 and 915 will now have taken on the adjustment properties of image 999.  I won’t just assume they are the best they can be though.  I’ll double check to see if they are sharpened properly and lighting, contrast, etc., are similar to #999.  Doing the synchronization in LR4 gets them real close to image 999.  Once images 908 and 915 are adjusted where I want them, I send them to CEP4 directly or via Photoshop, and apply the Recipe I saved from the processing of image 999.  I tweak any sliders I need to in the 3 filters for that Recipe and click OK in CEP4 to bring the finished product back to LR4.  The same is done for the third image and I now have three eagle shots that look relatively similar in processing and, I hope, better than they did before we started.  Here are the three finished images:


While these images weren’t the most labor-intensive images to do post-processing on, I hope this article has given you an idea of what a typical image of mine goes through before it is seen by the public.  Each photographer must decide how much or how little post-processing they want to do on their own images.

I’ll finish up the Digital Bird Photography with one more article covering getting images onto the web.  I also hope to write an article about Lightroom 4 and highlight some of the changes and additions that are in the new release.  Looking forward to seeing you for that one!  In the mean time, please check out my latest blog post from my Feb. 3, 2012, photo shoot at Ridgefield NWR.


<<Previous Article                                                                                     Next Article >>

Bird Photography Equipment (1)

DSLR Features for Bird Photography (2)

Memory Cards for Cameras (3)

Lenses for Bird Photography (4)

Bird Photography Accessories (5)

Tripod or Monopod? (6)

More Accessories for Bird Photography (7)

Software Introduction for Bird Photography (8)

Introduction to Capturing Bird Images (9)

JPG or RAW? (10)

Shooting Bird Photos (11)

Camera Exposure Modes (12)

Other Camera Settings and Features (13)

Exif Data (14)

Depth of Field and Aperture (15)

Best Time to Photograph Birds (16)

Composition in Bird Photography (17)

Getting Close in Bird Photography (18)

Backgrounds in Bird Photography (19)

Using External Flash in Bird Photography (20)

Photographing Birds in Flight, 21

Lightroom 3 – The Hub of My Workflow (22)

Processing Images in Lightroom 3 (23)
Processing Images in Lightroom 3 (24)

Using Lightroom to Upload Images (26)

Leave a Comment

Your email address will not be published. Required fields are marked *

My Gear:

  • Canon EOS 5D Mark IV & Grip
  • Canon EOS 7D Mark II
  • Canon EF 500mm f4L IS II
  • Canon EF 24-105mm f4L
  • Canon EF 50mm f1.8
  • Canon 1.4X III Extender
  • Canon 2x III Extender
  • Canon 580EX Flash
  • Zoom H1 Recorder
  • Better Beamer
  • Manfrotto tripod/monopod
  • Manfrotto Gimbal Head
  • Sandisk Compact Flash Cards
  • The Molar Bean Bag by Vertex
  • Joby Gorillapod Focus & Ballhead
  • Canon EG200 Backpack
  • Storm Jacket Camera Cover
  • Kinesis Safari Sack
  • Original Bug Shirt Elite Edition

Software:

  • Adobe Photoshop CC
  • Adobe Photoshop Lightroom Classic
  • Nik Color EFEX Pro 4
  • Nik Sharpener 3
  • Nik Dfine 2.0
  • Nik Viveza 2
  • Nik HDR Efex Pro 2
  • Nik Silver Efex Pro 2
  • Nik Analog Efex Pro