Processing Images in Lightroom 3, Part 24

Home » Processing Images in Lightroom 3, Part 24

Processing Images in Lightroom 3, Part 24

Posted in

Welcome to Part 24 of my Digital Bird Photography series.  This is a direct continuation of Part 23, which shows you how I use Lightroom 3 in post-processing.  Please read part 23 before this part!


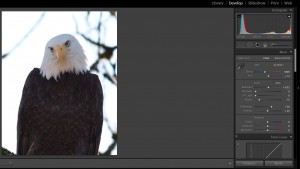
Next, I look at the histogram for this shot.  Here it is with the Tool Strip attached at the bottom.

As expected, the highlights (indicated on the right side of the graph) show as completely blown out due to the bright sky.  Even so, I don’t want to decrease exposure in an attempt to correct the blown highlights since that will take needed light off the bird.  In fact, I think I need more light on the bird so I’m going to increase the Exposure slider from zero to +.32.  I’m still not worried about the sky because it’s going to be white anyway—at least for now!

The left side of the histogram is another story.  The image looks flat and this is one reason why.  I need to increase my blacks to get the image to have darker tones in the shadows and to get the left side of the graph to move toward the left edge.  Notice in the picture above that the Black slider is at value 5—this is where my Develop Preset set it during import.  I’m going to increase the Blacks slider to +15.  Here is what the image looks like with these two changes.  To me, the image has already gotten better.  The histogram looks a little better too, with the left side of the graph closer to the left edge.

More detail is visible on both the white and dark feathers and the bird pops a little more than it did before. Notice I haven’t touched any of the other sliders because they were set the way they are during import.  Now, if I didn’t use Photoshop (PS) and Color EFEX Pro 4 (CEP4) in addition to Lightroom 3, I’d likely be doing some more adjusting of the controls in the Basic panel, and possibly even in the Tone Curve, Color, and Split Toning panels.  But I do use these other two programs and a lot more can be done to the image utilizing them.  My philosophy here is that I’ll give PS and CEP4 a try and see what happens.  If I’m not satisfied with the result, I’ll cancel out of those programs and return to LR3 for more enhancements if I think the image will be improved by doing so.

But there are other tools in LR3 that I want to apply to this image and they are Sharpening and Noise Reduction located in the Detail panel.  There are different schools of thought regarding when to apply sharpening and I’ve read many of them.  Some say to wait until the very end of processing and make it the last thing you do.  Others will tell you to do some sharpening early on and then apply a finishing touch near the end.  I have changed my mind on this over the years a few times and now, since LR3 has a great sharpening tool, I can usually get away with using it at this point in the process, and nothing else.  However, there are times when I’ll add a touch of Unsharp Mask in Photoshop if I think the image can benefit from it.

Sharpening is one of those subjects that no two photographers will do the same way.  As you gain experience using your sharpening tools, over time you’ll develop your own methods that fit your style of shooting.

Let’s get back to the task at hand, and that is applying the primary dose of sharpening to the image we’re working on.  I’ll follow it up with some Luminance noise reduction all within LR3 and all non-destructive changes to the image.

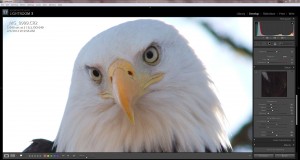
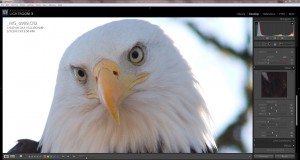
Below, I have pulled the right-hand scroll bar down to expose the Details panel.  This is where sharpening and noise reduction get accomplished in LR3.  I click once on the image and the zoom jumps in to a 100% crop.  Now I’m looking this guy right in the eyes!

I start by moving the Amount slider to the right and at the same time depress the ALT key.  The display changes to b&w making it a little easier to see noise creep into the shot as I move the slider further to the right.  Below is the screen shot showing the effects of moving the slider to 67.  Since I couldn’t operate my screen capture program, press ALT, and hold my mouse button down at the same time, I don’t have the b&w version to show you.  But you can still see the noise effects of moving the sharpening Amount to 67.

I’ve found that the sharper the RAW photo is out of the camera, the less sharpening is required here.  I normally push sharpening into the 70’s but this shot wasn’t too bad focus-wise, so I stopped at 67.  The shot is taking shape!

The Radius slider I am going to leave at 1.0.  That’s a good value for many shots, especially detailed shots that are in pretty good focus to begin with.  I will sometimes bump this value up if the shot is of a bird fairly far away and I want to make it look sharper.  But, if the bird is really too far away and not in the best focus, then maybe I shouldn’t be wasting time on it in post-processing!?!  For some purposes, it’s a good tool to have in sharpening.

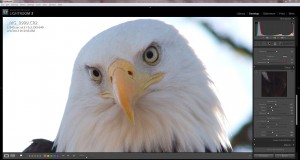
Now I’m going to squeeze out even more detail on the bird by moving the Detail slider over to 49.  For this tutorial, I happen to know that is where I want this slider set.  But in the real world, I came back to this slider several times while alternating adjustments between the Amount slider and this one, before settling on a value of 49.  I’ll usually try different combinations of slider values before I decide to stick with final values.  Below is the bird with the Detail set at 49.

The ALT key can also be used in conjunction with the Radius and Details sliders, the same as I did with the Amount slider above.  If I hold the ALT key down while dragging the Radius or Detail sliders, the display turns to a gray scale image and it helps me to see when I overdo the adjustments because lines of demarcation appear and unwanted artifacts develop from over-processing.  At this point, I back off the adjustments to just where I want them.

I can actually see more noise now but I’m not too worried because I’m going to deal with that in the next couple of steps.  Let’s move on to the Masking tool.

The Masking tool is LR3’s version of a selection tool, sort of.  I’ll now hold down the ALT key again, and slowly drag the Masking slider to the right.  The image area starts out completely white and as the slider is moved to the right, the white background slowly turns darker until it is completely black.  Objects in the image, like the bird, will not be black and shouldn’t be since the areas with the cleanest, plainest properties will turn black first.  Black areas are being masked from the affects of the sharpening tools.  The non-black areas will be affected by the sharpening tools—the whiter, the stronger the affect is.  If I move the Masking tool all the way over to the right, at value 100, the whole eagle turns black except for around the eyes and the perimeter of the bird.  If I left the slider here, sharpening would be affecting a very limited amount of the image.  For some images this may be fine.  It depends on the image and how the photographer wants to approach sharpening.  In the case of this eagle, I want to sharpen all the feathers and bring out as much detail as I can.

[Again, I wish I could capture the screen with the ALT key pressed so you could see what I’m looking at.  But I need three hands!]

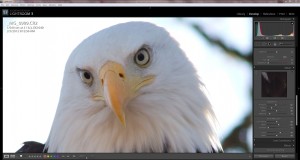
Here’s the screen shot after the Masking tool is set to 9.

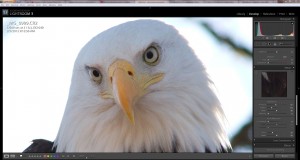
And, here’s the screen with the image at 100% crop.  Looks like we’ve got some noise to clean up, but the details are coming along nicely.

Let’s move on to the Luminance Noise Reduction tool in LR3.  The first three sliders, Luminance, Detail, and Contrast, all affect only luminance noise.  The two bottom sliders, Color and Detail, affect color noise only.  These are at the lower-right of the screen.  Note that the last two of the luminance sliders, Detail and Contrast, are grayed out right now.  But when I move the Luminance slider above zero, the other two will activate.

This is what I’m going to do now.  I move the Luminance slider to the right no further than I have to but to the point where most of the noise is gone from the bird.  In this case, I’m moving it to 49.  Again, I arrived at this number through trial and error–moving the three luminance noise sliders in different combinations.  I can move the Detail slider over some with no appreciable increase in noise so I push it over to 61.  The Detail slider (for luminance) controls the luminance noise threshold.  In this picture, the Contrast slider doesn’t change the image much so I’m leaving it at zero.

For the Color slider, I’m moving it over to 70.  It helps especially with the noise on the bird’s bill.  The Detail slider under Color makes minute adjustments to detail but again, I don’t want to overdo it or it will just introduce more noise.  I’m happy just to leave it at 50 for this shot.  Here’s a look at the shot zoomed in to 100%.  Remember, this is zoomed way in so what noise you can still detect will be all but invisible at normal view.

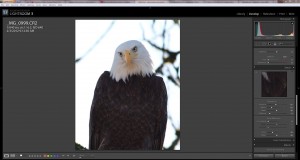
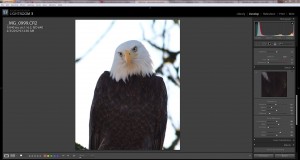
And here’s the shot at normal view.

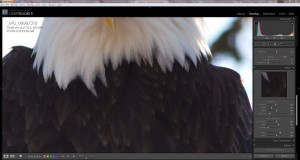
And here is a zoomed in shot of the neck and breast feathers.

I think this bird is starting to look pretty good.  But we have more to do.  I still need to take the image into Photoshop and get rid of those background branches.  Plus, I’m going to give the image some punch by taking it into Nik Color EFEX Pro 4.  However, I will cover these steps in the next Part (#25) to my Digital Bird Photography series.


<<Previous Article                                                                                     Next Article >>

Bird Photography Equipment (1)

DSLR Features for Bird Photography (2)

Memory Cards for Cameras (3)

Lenses for Bird Photography (4)

Bird Photography Accessories (5)

Tripod or Monopod? (6)

More Accessories for Bird Photography (7)

Software Introduction for Bird Photography (8)

Introduction to Capturing Bird Images (9)

JPG or RAW? (10)

Shooting Bird Photos (11)

Camera Exposure Modes (12)

Other Camera Settings and Features (13)

Exif Data (14)

Depth of Field and Aperture (15)

Best Time to Photograph Birds (16)

Composition in Bird Photography (17)

Getting Close in Bird Photography (18)

Backgrounds in Bird Photography (19)

Using External Flash in Bird Photography (20)

Photographing Birds in Flight, 21

Lightroom 3 – The Hub of My Workflow (22)

Processing Images in Lightroom 3 (23)

From Lightroom to Plugins (25)

Using Lightroom to Upload Images (26)

Posted in

Welcome to Part 24 of my Digital Bird Photography series.  This is a direct continuation of Part 23, which shows you how I use Lightroom 3 in post-processing.  Please read part 23 before this part!


Next, I look at the histogram for this shot.  Here it is with the Tool Strip attached at the bottom.

As expected, the highlights (indicated on the right side of the graph) show as completely blown out due to the bright sky.  Even so, I don’t want to decrease exposure in an attempt to correct the blown highlights since that will take needed light off the bird.  In fact, I think I need more light on the bird so I’m going to increase the Exposure slider from zero to +.32.  I’m still not worried about the sky because it’s going to be white anyway—at least for now!

The left side of the histogram is another story.  The image looks flat and this is one reason why.  I need to increase my blacks to get the image to have darker tones in the shadows and to get the left side of the graph to move toward the left edge.  Notice in the picture above that the Black slider is at value 5—this is where my Develop Preset set it during import.  I’m going to increase the Blacks slider to +15.  Here is what the image looks like with these two changes.  To me, the image has already gotten better.  The histogram looks a little better too, with the left side of the graph closer to the left edge.

More detail is visible on both the white and dark feathers and the bird pops a little more than it did before. Notice I haven’t touched any of the other sliders because they were set the way they are during import.  Now, if I didn’t use Photoshop (PS) and Color EFEX Pro 4 (CEP4) in addition to Lightroom 3, I’d likely be doing some more adjusting of the controls in the Basic panel, and possibly even in the Tone Curve, Color, and Split Toning panels.  But I do use these other two programs and a lot more can be done to the image utilizing them.  My philosophy here is that I’ll give PS and CEP4 a try and see what happens.  If I’m not satisfied with the result, I’ll cancel out of those programs and return to LR3 for more enhancements if I think the image will be improved by doing so.

But there are other tools in LR3 that I want to apply to this image and they are Sharpening and Noise Reduction located in the Detail panel.  There are different schools of thought regarding when to apply sharpening and I’ve read many of them.  Some say to wait until the very end of processing and make it the last thing you do.  Others will tell you to do some sharpening early on and then apply a finishing touch near the end.  I have changed my mind on this over the years a few times and now, since LR3 has a great sharpening tool, I can usually get away with using it at this point in the process, and nothing else.  However, there are times when I’ll add a touch of Unsharp Mask in Photoshop if I think the image can benefit from it.

Sharpening is one of those subjects that no two photographers will do the same way.  As you gain experience using your sharpening tools, over time you’ll develop your own methods that fit your style of shooting.

Let’s get back to the task at hand, and that is applying the primary dose of sharpening to the image we’re working on.  I’ll follow it up with some Luminance noise reduction all within LR3 and all non-destructive changes to the image.

Below, I have pulled the right-hand scroll bar down to expose the Details panel.  This is where sharpening and noise reduction get accomplished in LR3.  I click once on the image and the zoom jumps in to a 100% crop.  Now I’m looking this guy right in the eyes!

I start by moving the Amount slider to the right and at the same time depress the ALT key.  The display changes to b&w making it a little easier to see noise creep into the shot as I move the slider further to the right.  Below is the screen shot showing the effects of moving the slider to 67.  Since I couldn’t operate my screen capture program, press ALT, and hold my mouse button down at the same time, I don’t have the b&w version to show you.  But you can still see the noise effects of moving the sharpening Amount to 67.

I’ve found that the sharper the RAW photo is out of the camera, the less sharpening is required here.  I normally push sharpening into the 70’s but this shot wasn’t too bad focus-wise, so I stopped at 67.  The shot is taking shape!

The Radius slider I am going to leave at 1.0.  That’s a good value for many shots, especially detailed shots that are in pretty good focus to begin with.  I will sometimes bump this value up if the shot is of a bird fairly far away and I want to make it look sharper.  But, if the bird is really too far away and not in the best focus, then maybe I shouldn’t be wasting time on it in post-processing!?!  For some purposes, it’s a good tool to have in sharpening.

Now I’m going to squeeze out even more detail on the bird by moving the Detail slider over to 49.  For this tutorial, I happen to know that is where I want this slider set.  But in the real world, I came back to this slider several times while alternating adjustments between the Amount slider and this one, before settling on a value of 49.  I’ll usually try different combinations of slider values before I decide to stick with final values.  Below is the bird with the Detail set at 49.

The ALT key can also be used in conjunction with the Radius and Details sliders, the same as I did with the Amount slider above.  If I hold the ALT key down while dragging the Radius or Detail sliders, the display turns to a gray scale image and it helps me to see when I overdo the adjustments because lines of demarcation appear and unwanted artifacts develop from over-processing.  At this point, I back off the adjustments to just where I want them.

I can actually see more noise now but I’m not too worried because I’m going to deal with that in the next couple of steps.  Let’s move on to the Masking tool.

The Masking tool is LR3’s version of a selection tool, sort of.  I’ll now hold down the ALT key again, and slowly drag the Masking slider to the right.  The image area starts out completely white and as the slider is moved to the right, the white background slowly turns darker until it is completely black.  Objects in the image, like the bird, will not be black and shouldn’t be since the areas with the cleanest, plainest properties will turn black first.  Black areas are being masked from the affects of the sharpening tools.  The non-black areas will be affected by the sharpening tools—the whiter, the stronger the affect is.  If I move the Masking tool all the way over to the right, at value 100, the whole eagle turns black except for around the eyes and the perimeter of the bird.  If I left the slider here, sharpening would be affecting a very limited amount of the image.  For some images this may be fine.  It depends on the image and how the photographer wants to approach sharpening.  In the case of this eagle, I want to sharpen all the feathers and bring out as much detail as I can.

[Again, I wish I could capture the screen with the ALT key pressed so you could see what I’m looking at.  But I need three hands!]

Here’s the screen shot after the Masking tool is set to 9.

And, here’s the screen with the image at 100% crop.  Looks like we’ve got some noise to clean up, but the details are coming along nicely.

Let’s move on to the Luminance Noise Reduction tool in LR3.  The first three sliders, Luminance, Detail, and Contrast, all affect only luminance noise.  The two bottom sliders, Color and Detail, affect color noise only.  These are at the lower-right of the screen.  Note that the last two of the luminance sliders, Detail and Contrast, are grayed out right now.  But when I move the Luminance slider above zero, the other two will activate.

This is what I’m going to do now.  I move the Luminance slider to the right no further than I have to but to the point where most of the noise is gone from the bird.  In this case, I’m moving it to 49.  Again, I arrived at this number through trial and error–moving the three luminance noise sliders in different combinations.  I can move the Detail slider over some with no appreciable increase in noise so I push it over to 61.  The Detail slider (for luminance) controls the luminance noise threshold.  In this picture, the Contrast slider doesn’t change the image much so I’m leaving it at zero.

For the Color slider, I’m moving it over to 70.  It helps especially with the noise on the bird’s bill.  The Detail slider under Color makes minute adjustments to detail but again, I don’t want to overdo it or it will just introduce more noise.  I’m happy just to leave it at 50 for this shot.  Here’s a look at the shot zoomed in to 100%.  Remember, this is zoomed way in so what noise you can still detect will be all but invisible at normal view.

And here’s the shot at normal view.

And here is a zoomed in shot of the neck and breast feathers.

I think this bird is starting to look pretty good.  But we have more to do.  I still need to take the image into Photoshop and get rid of those background branches.  Plus, I’m going to give the image some punch by taking it into Nik Color EFEX Pro 4.  However, I will cover these steps in the next Part (#25) to my Digital Bird Photography series.


<<Previous Article                                                                                     Next Article >>

Bird Photography Equipment (1)

DSLR Features for Bird Photography (2)

Memory Cards for Cameras (3)

Lenses for Bird Photography (4)

Bird Photography Accessories (5)

Tripod or Monopod? (6)

More Accessories for Bird Photography (7)

Software Introduction for Bird Photography (8)

Introduction to Capturing Bird Images (9)

JPG or RAW? (10)

Shooting Bird Photos (11)

Camera Exposure Modes (12)

Other Camera Settings and Features (13)

Exif Data (14)

Depth of Field and Aperture (15)

Best Time to Photograph Birds (16)

Composition in Bird Photography (17)

Getting Close in Bird Photography (18)

Backgrounds in Bird Photography (19)

Using External Flash in Bird Photography (20)

Photographing Birds in Flight, 21

Lightroom 3 – The Hub of My Workflow (22)

Processing Images in Lightroom 3 (23)
From Lightroom to Plugins (25)

Using Lightroom to Upload Images (26)

Leave a Comment

Your email address will not be published. Required fields are marked *

My Gear:

  • Canon EOS 5D Mark IV & Grip
  • Canon EOS 7D Mark II
  • Canon EF 500mm f4L IS II
  • Canon EF 24-105mm f4L
  • Canon EF 50mm f1.8
  • Canon 1.4X III Extender
  • Canon 2x III Extender
  • Canon 580EX Flash
  • Zoom H1 Recorder
  • Better Beamer
  • Manfrotto tripod/monopod
  • Manfrotto Gimbal Head
  • Sandisk Compact Flash Cards
  • The Molar Bean Bag by Vertex
  • Joby Gorillapod Focus & Ballhead
  • Canon EG200 Backpack
  • Storm Jacket Camera Cover
  • Kinesis Safari Sack
  • Original Bug Shirt Elite Edition

Software:

  • Adobe Photoshop CC
  • Adobe Photoshop Lightroom Classic
  • Nik Color EFEX Pro 4
  • Nik Sharpener 3
  • Nik Dfine 2.0
  • Nik Viveza 2
  • Nik HDR Efex Pro 2
  • Nik Silver Efex Pro 2
  • Nik Analog Efex Pro