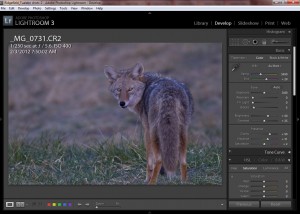
Lightroom 3 – The Hub of My Workflow, Part 22

Home » Lightroom 3 – The Hub of My Workflow, Part 22

Lightroom 3 – The Hub of My Workflow, Part 22

Posted in

[Edit Mar. 9, 2012: A few days ago, Lightroom 4 was released by Adobe.   While version 4 has some new adjustment tools and modules (Map & Book), the overall interface and the order in which tasks get done have not changed.  So even though there are some new options to work with in version 4, my series on Lightroom 3 is still relevant.  If you are using the new version, you can apply the same order of operations as I describe with the new tools that have been introduced.  Adobe has actually replaced some of the Basic adjustment tools with new ones, so your screen will look a little different than the screen shots posted here.  The primary modules I work in are still Library and Develop, whether I’m using version 3, 4, 5, or 6. ]

UPDATE Sep. 1, 2013:  In June, Lightroom 5 was released.  Again, a few new tools were added but the program has the same basic layouts and the following is still relevant.

UPDATE May 3, 2015:  In April, Lightroom 6/CC was released.  Major new features include HDR and stitching multiple photos together.  They’ve also added a brush feature to the Graduated and Radial filter tools which can make it relatively easy to add to or erase the effects from local parts of the image.  As new tools were added to Lightroom since version 3, I occasionally use them and it’s good to know they are there.  Again, it depends on the image as to whether and when I use Lightroom, Photoshop, or the Nik Suite to perform certain post processing functions.  But Lightroom still remains the hub of my workflow, where images are originally imported and from where the finished image is exported.

In the previous 21 sections of this series, I’ve attempted to share much of what I have learned and experienced in my five years of photographing birds.  I’m continuing now with an example of a Post-processing workflow that is always subject to change.  Workflow processes and tools are probably different for every digital photographer and they probably change as time goes on.  You will find the workflow that works for you as you process more images.

I use the following programs to help me accomplish my post-processing.

  • Adobe Photoshop Lightroom CC (LR6) which does RAW conversions, adjustments, enhancements and image cataloging
  • Adobe Photoshop CC which helps me do image enhancements that Lightroom CC may not be able to do as easily or as effectively
  • Nik Complete Suite including Color EFEX Pro 4 (CEP4), a powerful filtering plug-in for CC and LR6, which polishes off the image
  • [Below when I use the term LR3, whatever version of Lightroom you are using can be substituted; same goes for CS6]

During this discussion of my workflow, I delve into these software programs (to the extent I know how to use them) in quite a bit of detail.  In no way do I think that I know it all!  I’m merely explaining my experiences with the software and how I get my photos processed.  I’m taking a risk here, hoping that this won’t bore too many readers.  The first program I use in processing my shots is Lightroom 3.  I’ll cover Photoshop and CEP4 as I get to them in the workflow.

If there is one thing I’ve learned about Adobe products, their full power and capabilities are not always apparent just by clicking buttons and icons in the workspace.  Many powerful functions are accessed by a combination of a keyboard action along with a mouse click.  This is another reason I think detail is important in this article.

In this Part (22) of the series, I’ll begin importing my photos taken Feb. 3, 2012, and describing all the panels available in Lightroom 3.  This will give readers a look at the tools I have available to process RAW photos in Lightroom.  I intentionally don’t get deep into the ‘how-to’ of using the programs features in this Part, except for the task of importing images, which will take you through item (F) in the workflow list shown below.  Current Lightroom users will be familiar with most of what I cover and perhaps you can add to the discussion if I missed something!  Comments are encouraged to help me learn, too!  For users of different RAW converters, my detailed explanations of LR3 can serve as a tool for comparing your RAW converter to LR3. If you’re looking at possibly changing programs, this article could help you decide if LR3 is what you’re looking for.

In Part 23, I jump into actually working on some images and continuing through my workflow (below) toward the finished image.

In previous Parts of this series on Digital Bird Photography, I attempted to put into words my experiences in buying photo equipment, using the equipment, and techniques and tips for going out and photographing birds.  Now, I’m back home from my latest shoot and ready to process the shots I took.  I have hundreds of images saved onto my camera’s compact flash card.  I’ve seen some of them on the camera’s LCD screen and some look like they might be sharp but a lot of them don’t look so good.  I’ll know for sure once I import the images from my camera to my computer.

[One technical note: I want to disclose that I use a Windows 7, 64-bit computer and everything I discuss from here on out is done on this Windows computer.  If you use a Mac, and I describe a Windows operation, please use the equivalent operation on the Mac.]


Workflow


I want to start with a summary of my own workflow.  This will serve as an outline that I follow throughout the process of getting my images off the memory card and into a state where I can display them for the public.


My Workflow Basic Steps


A. Raw Images on Compact Flash card

B. Place card into computer card reader

C. Start Lightroom 3

D. Import all images into my Lightroom catalog using my customized Develop Presets and other pre-import settings on the Lightroom Import screen

E. Do general keywording on the Import screen, such as, the location of the shots

F. Raw images will be copied into a folder on my computer that is named with the day/month/year I took the images and imported into Lightroom’s catalog

G. In Library Mode – Weed out the obvious deletions based on out of focus, extreme exposure problems, bad poses, etc.

H. Compare images with similar poses of the same bird to a 100% crop–keep the sharpest few similar shots, mark the rest as rejects

I. Inspect each remaining image at 100% crop –especially the eye, bill, and head feathers–for sharpness–mark as rejects if they don’t meet my own sharpness standards

J. Inspect the remaining images for good light, pose, background, colors, etc., and mark or tag a photo if it stands out as exceptional

K. Do specific keywording in the Library module using advanced keywording tools for just the images I plan to keep

L. In Develop Mode – Check histogram for exposure extremes and adjust appropriate sliders to correct

M. Filter the remaining images so that only the tagged ones (potential keepers) are visible in the filmstrip

N. Pick an image I want to process

O. Determine if white balance or tint needs adjusting; make these adjustments

P. Use crop, spot removal, grad filter, adj brush and Adjust as needed: Contrast, highlights, shadows, whites, blacks, clarity, vibrance, saturation. Do as much as possible on the RAW image in Lightroom

Q. Adjust sharpening and noise reduction in Lightroom 3

R. If more complicated objects need to be removed, lightened, darkened, selected, blurred, sharpened–image goes to Photoshop as a TIF using the “Edit In” command in Lightroom 3

S. Apply Photoshop actions or Color EFEX Pro 4 filters if needed

T. File/Save in Photoshop to add the enhanced image to Lightroom 3, save the enhanced TIF image on my hard disk, and add the image to the LR3 catalog

U. Go back to item N and repeat thru T for the next selected image

V. Create appropriate size and resolution images for upload to websites using Lightroom 3

W. Backup files

If you have read Part 10 of this series, JPG or RAW Format?, Part 10, you’re aware that I prefer to shoot in RAW format over JPG.  As I proceed through my post-processing workflow in detail, I’ll do it using RAW images from the camera since this is me sharing my experiences with you.  I have no practical experience processing JPG images from the camera but most of what I cover surely can apply to JPG, as well.


Adobe Photoshop Lightroom


I’ve been using Lightroom (LR3) since version 1 (about 5 years ago) and Adobe is just about to release version 4.  The program is a RAW converter, editor, and cataloger for my images.  The program also catalogs and edits TIF and JPG images.

LR3 has five modules I can work in:  Library, Develop, Slideshow, Print, and Web.  Lightroom 4 will add two more modules which are Map and Book (at least this is the current count in the LR4 beta program.  This can always change between now and the LR4 release date).  For purposes of this article, I will be limiting my discussion to the two modules in LR3 I use the most–Library and Develop, where 99% of my processing work occurs.

In the upcoming release of LR4, the new Map and Book modules could be of some use to me but I haven’t yet evaluated them or my need for them at this point.  Although I have done some experimenting with LR4 developing some of my images, this article will be based on my use of LR3, which is my current primary RAW image editing and cataloging tool.  LR4 will also have some video editing capability and the adjustment tools have been changed, added to, and improved upon.  I plan to do a review of LR4 at some point after its release and after I’ve had a chance to test drive its new features.


Importing Images Into Lightroom


I have my camera’s memory card (compact flash card in my case) inserted into my card reader and LR3 is running.  I switch to Library mode since that’s the mode that manages my image catalogs.  Within the Library mode, I click on the Import button and the Import screen appears as shown below.

[Click on the images for a larger view–they’ll be much easier to read!].
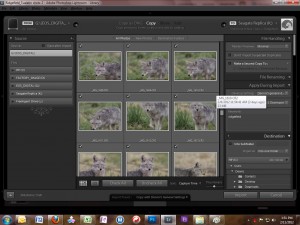
[Note on this screen print: this isn’t the image I wanted here but I ran into some technical problems that kept me from replacing it.  The white pop up box is covering up some stuff I wanted to show.  You can also see that the images showing are from my Feb. 8 shoot, not Feb. 3, which is the group of shots I meant to depict here.  It does show the overall layout of the import screen well though.]


The Import Screen Interface


The left side of the Import screen shows the Source drives available on my computer.  In this case, I have selected my Drive G which is my Compact Flash card reader.  The center of the screen shows thumbnails of the images that are on Drive G.  You can see there is a box I can check to include or exclude any images I want for import.  Typically, I leave all images checked as I want all imported.    At the top center of the screen above the thumbnails, I can select “Copy as DNG” or “Copy.”  “Copy” copies the RAW file without changing it.   (Move and Add are unavailable when importing from a memory card).  I could choose “Add” if the RAW files were already copied over to a hard disk.  I talked a little about DNG files back in Part 10 of this series.  Currently, I’m not using DNG files so I select “Copy,” which tells LR3 to copy the RAW images from my CF card to my chosen folder on a hard disk and add them to my catalog.

On the right side of the Import screen, the first panel at the top is called File Handling. “Render Previews” is a choice I have when LR3 renders the previews for my images after they are imported.  Here I can choose Minimal or Standard.  I’ve always left this at minimal to speed things up a bit.  The next choice under File Handling is whether or not I want LR3 to import suspected duplicates.  If I check the box, LR3 will not import duplicates.  In fact, it will gray out the thumbnails in the center of the screen for any image it thinks is a duplicate.  This could be helpful if I had more than one photo shoot on a CF card and I had already imported one of them.  But I rarely have more than one shoot on a card at the same time so I usually keep this unchecked.

The last choice under File Handling is whether to make a second copy of my images to a backup disk at the same time the images are being imported to my working disk.  This is okay for rudimentary backups but I don’t use this because I have my own backup system in place that I hope to describe near the end of this series.  I leave this backup box unchecked.

The next panel on the right side of the Import screen is File Renaming.  In this panel I can tell LR3 how I want my files named when they get written to my hard disk.  There are a myriad of customizable choices here and it’s a great tool but, for now, I’m happy with the file name as it comes out of the camera.  Therefore, I haven’t used File Renaming on a regular basis for importing images.  I do use the file renaming tools in LR3 when creating JPG images of my finished photos for use on various Internet sites.  I’ll talk more about this later.

The next panel is called Apply During Import. Here there is a drop down menu of presets from which I choose my “Develop Settings.”  The lists of presets to choose from are mostly built in ones that came with LR3.  I have also created my own develop preset to meet my own needs and this preset is part of the list I have to choose from.  LR3 lets me apply any develop settings to all my imported images–automatically.  These settings can include controls such as contrast, brightness, black clipping, white balance, etc.  The preset I created for my use is called “Dennis’s General Develop Preset,” and it remembers a slider value for all the controls available in the Develop module that I would like applied to every RAW file that is imported.

You can see in the screen shot above that I have selected this preset in Develop Settings.  I’ll be sharing my preset’s specific settings later, which you can use as a starting place for your own preset and tweak however you like to fit your taste and your camera’s processing characteristics.  I’d venture to say that all RAW files need some minimum boost in contrast, vibrance, saturation, etc., as an initial adjustment to get them looking good.  In fact, LR3 actually defaults to setting some of the sliders at certain initial values above zero unless they are overridden.  My personal preset uses some of LR3’s default settings but goes a little further with higher value settings on a few of the adjustment tools.

If you are a LR3 user, and you haven’t yet created Develop Settings presets, you may want to give this a try.  It’s a personal decision as to what adjustments you choose.  This step alone saves a lot of time on the original round of adjustments that I will be applying to my images.  It also helps with consistency since each image gets the exact same treatment and it gets done fast.

Another entry I can make in the Apply During Import panel is the photographer’s name.  This is an entry that gets added to each image’s Metadata.  As expected, I would typically use my name here but there are times when I have reason to import images taken by my daughter or brother, which means I would enter their names here.

The final field in the Apply During Import panel is called Keywords.  This is where I can add general keywords to the images as they are being imported.  It’s not meant to be the primary keywording tool in LR3 but instead for general terms that apply to numerous shots, can easily be made here.  This would be a good time for me to enter the word “ridgefield” and/or “nature” since both these terms apply to all 699 images I’m about to import.

Side Note:  I hate to admit it but in practice I have done a terrible job of keywording my photos.  I have over 31,000 photos in my wildlife catalog and not very many of them are keyworded.  The project is so big now, I’m not sure I’ll ever get it done.  Don’t let this happen to you.  If you want to be able to easily search and find images by bird ID, animal ID, or location, in the future, take the time to do proper keywording.  No matter what program you use to catalog your images, take the time to enter keywords so you can use the search capability of the software to find images by searching on keywords.  Keywording is a pain and it takes a little extra time but you’ll be glad you did when you accumulate thousands of images in your database and you want to know quickly what eagle images you have, for instance, and where they are.

In LR3, the major task of specifically keywording images should be done in Library mode after you have screened your shots and deleted the many junk shots (out of focus or otherwise obviously terrible shots).  This way you won’t waste time keywording images that will end up being deleted during screening.  This is the time to enter bird names and perhaps the word ‘flight’ for your flight images, etc.  Enter these specific keywords for just the images you’ve decided to keep.  In LR3, there are more powerful keywording tools available in the Library module than there is on the Import screen, for images that are already imported to the LR catalog.

There is one more panel after the Apply During Import panel, and it is called the Destination panel.  Remember, we are still talking about the right-hand side of the Import screen.  This Destination panel is basically a replica of the file structure of my computer.  It includes all drives and folders that are on my computer (not files).  This is where I choose the location on my computer where I want to store these 699 new RAW images.   For my current import job, I’ll navigate to the parent folder, Ridgefield, where I want my new folder stored (that will contain the images) and highlight it.  I’ll check the box next to the “Into Subfolder” field, and type the name of the new folder in that field with the date name, 3Feb2012.  LR3 will create a new folder called, 3Feb2012, inside the existing folder named Ridgefield, and store all the RAW files there.

So you can see that the flow on the Import screen is clockwise–fairly intuitive.  The very bottom right corner of the Import screen has two buttons, Import and Cancel.  Now it’s time to click the Import button.  If I don’t want to import for some reason, I choose Cancel, and the Import screen will close.

Note that only links to the images (not the images themselves) get filed into the LR3 catalog that I chose to open when I opened LR3 (only one catalog can be opened at any time).  The actual image file is located in the folder on my computer that I chose to import it to.  This means there is only one copy of each RAW file on my computer that LR3 needs and keeps track of.  If for some reason I move any of these RAW files (or any image files that are cataloged) from their present location using my computer’s file manager, LR3’s link will then be broken and no editing can be done on these moved files in LR3 until the link has been re-established in LR3.  The LR3 link will also be broken if I change a folder’s name or an image’s filename using the computer’s file manager.  Fixing this is a matter of pointing LR3’s catalog folder to the new location (or folder name) where the images were moved.

At this point, I’ll take some time to show and explain the LR3 Library and Develop modules‘ interfaces so you are a little more familiar with what I’m referring to when I get into the actual processing of my images.  If you don’t use LR then you might be able to compare what I’m describing here to your own RAW converter program.  This may also serve as a mini-review of LR3 so you can see how the user interface works in case you’re in the market for a new RAW converter program.


The Library Module


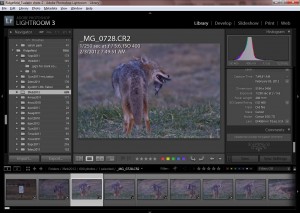
Now that I’ve imported my new files into LR3’s catalog and onto my computer, the Import screen has closed and I’m back to the Library module in LR3.  Below is my screen set to display in Library mode.  (I use ‘mode’ and ‘module’ interchangeably).


The Library Module Interface


Left Side – Library

In both the Library module and the Develop module, the left side, top panel of the screen is called the Navigator.  In Library mode, the Navigator area displays all my drives and folders that correspond to images in my image catalog.  In other words, prior to importing my 3Feb2012 images, a folder with that name would not have appeared in the LR3 Navigator since the folder had not been created yet and images did not yet exist in the catalog.   Since I just imported the images into the newly created 3Feb2012 folder, the Navigator now lists that folder, with its new images, under my Ridgefield folder, as it appears on my hard disk.

Underneath the Navigator panel in the Library mode is the Collections panel.  Collections are just a group of images that you choose to have saved as a group–like maybe for a slideshow.  I can make as many collections as I want or need.  A Smart Collection is a collection of images that automatically gets selected based on criteria that I have set up for the Smart Collection.  Perhaps I want all Red coded images or all five-star rated images to automatically get copied into a Smart Collection because those might be the images I plan to do full processing on.  So as I review my images, I could mark the good ones Red or 5-star and they automatically end up in my smart collection for easy access.  I haven’t been using this feature much but now that I’ve written about it I can think of a few good uses for it.

The final panel on the left side is the Publish Services panel.  Here you can configure LR3 to upload images to Flickr, Facebook, and SmugMug.  I use this tool to upload photos to my Flickr account and it makes it very easy.

Center – Library

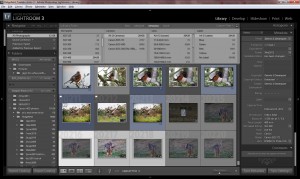
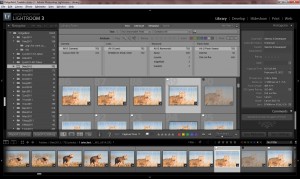
The center of the screen obviously has the large image viewing area.  But above this and below this are some powerful and useful tools.  Let’s start with the Library Filter, which is located at the top of the main image viewer.  In the center of the screen are buttons for Text, Attribute, Metadata, and None.  I hide the filter by selecting None.  I invoke the filter by selecting either Text, Attribute, or Metadata, or a combination of up to all three (use Ctrl while selecting).  The Text filter allows me to search for keywords, or words in a filename, for instance.  The Attribute filter filters by rating, color, flag setting, or even kind of image, such as virtual copy, master photo, or video.  The Metadata filter lets me filter by almost any piece of Exif data I can think of.  The Metadata results are displayed in four columns at the center top of the screen.  Each column can be customized to display many aspects of Metadata I choose.  In the screen shot below you can see I chose as my columns Camera, Lens, Keyword, and Flash State, under the heading Camera Info.

The Camera results show I took all 702 images with my 7D.  (The number of images has grown from 699 to 702 due to my test processing of some images to assist with this article).  The Lens results show all were taken with my 400mm prime lens (without the 1.4x extender).  The Keyword results indicate that only 3 of 702 images have any keywords entered at all, and those keywords are coyote, ridgefield, and tualatin (these 3 words are only samples for this illustration–they don’t really make sense).  The Flash State results indicate that I used flash on 96 out of 702 photos during my Feb. 3 photo shoot.

Directly underneath the main image viewer (see above screen shot and below close up), is a lighter gray tool bar that can display my choice of many available tools.  Depending on which view is activated, Grid, Loupe, Compare, or Survey, different tools are available.  Let’s start with the Grid View.  The tool bar with Grid View selected is shown below.  I’ve chosen to show all the tools available for this illustration.

From left to right, you can see the 4 View icons–Grid, Loupe, Compare, and Survey.  Next there is a paint can icon which is called the Painter tool.  This is used to ‘paint’ any Develop Preset onto any of my grid images.  It’s a quick way to apply these presets to multiple images after they have been imported.  Next is a Sort Direction icon and a Sort Criteria drop-down menu.  These affect which images and in which order these images display in the grid area and in the filmstrip.  Next is the Pick flag and the Reject flag, the star rating tool, the color labeling tool, and the previous and next arrows.  The Thumbnail slider is on the very right of the tool bar which adjusts thumbnail size.


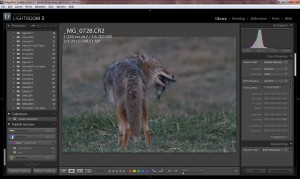
For Loupe View, see the screen shot below.  Here I have all the tools visible except for the sorting tool.  Here the tools are the same as most in the Grid view.  The primary difference is this view displays the largest view of my selected image directly above this tool bar.


For Compare View, see the screen below.

This view allows me to compare a selected image to a candidate image with both images zoomed in and synced if I want.  You can see in some of the above larger screen shots that I have many similar shots of a coyote.  I’ll probably be using this tool to make sure I identify the sharpest image of the bunch.  I pick a good image as the selected image, then hit the next or previous arrow to bring up a candidate image next to it.  I compare sharpness.  If the candidate is not sharper than the selected image, I go on to another candidate until the candidate is sharper.  When it is, I can either swap the images in the two windows or make the candidate the selected image.  Then I continue comparing the rest of the candidates.  I then click the Done button over on the right (partially cut off in the above image), which deactivates Compare view.  This view doesn’t allow any other tools to be shown on the tool bar.


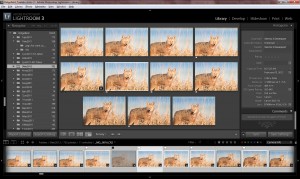
The last viewing mode is the Survey View.  Below is the image of the whole screen in Survey View.  I’ve chosen to hide most of the tools from view in this screen shot.  Most of the tools in Grid and Loupe views are also available here to show if I choose to.  Survey view lets me view a specific set of images that I have selected, all visible at the same time.  In the screen shot, I’ve selected 11 coyote shots with similar poses.  A quick look at all images together helps me choose which pose is the most interesting.  I can mark any image as a Pick or a Reject from this screen and also delete the image from the view (without deleting from the catalog or hard disk).  If I delete some from this view, I can go to the filmstrip and click some more images and they will be immediately added to the view for consideration.  Also, I can easily temporarily hide the left and right panels in the Library module to increase the space available for more selections.  As I add new selections, the size of all the selections decrease to allow room for the new ones.  I wouldn’t want to add too many at a time or the images would become too small to accurately evaluate.  This concludes my description of the center section tools.  Let’s move to the right-side panels.

Right Side – Library

On the right side of the screen in the Library module, the Histogram is at the top.  Directly underneath the histogram are some Exif data about the image I have highlighted.  Here it displays the ISO setting, the focal length, the aperture, and the shutter speed.  I find myself glancing up at these values quite often.

The next panel below the Histogram is the Quick Develop panel.  This panel gives me access to many of the actual develop adjustment tools that I’ll be using in the Develop module except that the ability to control each adjustment slider is not quite as precise as it is in the Develop module itself.  LR3 gives me access to the Develop controls in the Library module if I am reviewing my images in Library mode to determine if I want to keep them.  I’m able to apply many of the various adjustments to the images without having to leave the Library mode and switch over to Develop mode.  So this is more of a “get an idea of how an image might look” tool, which can help me decide if the image is even worth keeping.

The adjustments I can apply here in the Quick Develop panel include crop ratio, color or B&W treatment, white balance, tone control, exposure, recovery, fill light, blacks, brightness, contrast, clarity and vibrance.  There’s also a Reset button here so I can zero out all trial adjustments I did on the image if I want.  This gets the image back to its state at the time it was imported.  I can also apply any of my saved Develop presets here, including ones I created, presets that came with the program, and presets that I acquired from a third party.  So, the Quick Develop panel has some powerful features.  Below is a screen print showing the Quick Develop panel.  I removed the filmstrip area at the bottom of the screen so I could show the entire Quick Develop panel on the right.

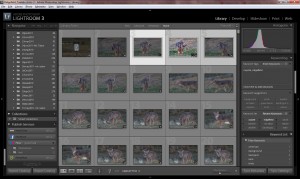
The next panel in the Library mode underneath Quick Develop is the Keywords panel.  This is where the major keywording gets done.  Here is the screen print for Keywording.

Notice that I have changed the center view from Loupe View to Grid View so that multiple images can be viewed.  These thumbnails can be made even smaller (so more are visible at the same time) by adjusting the Thumbnails slider at the bottom right of the center view area.  When more images are visible, keywording can be done to more images at once, speeding up the task.

LR3 has many good tools for speeding up the job of keywording.  It’s pretty evident that the less typing a person has to do the easier and faster the job will be.  One trick is to press the “Alt” key while the “Keyword Set” area is visible.  The Keyword Set is a display of the nine most relevant keywords that I would use on this particular set of images.  When I press the “Alt” key, the numbers 1 through 9 show up next to these 9 words.  If I press the corresponding number on the number keypad, the keyword for that number gets entered into the keywords text window.  Alternatively, I can click the word I want to choose with the mouse pointer to get the same result.  There are other tips and tricks that can be done to speed up keywording.  Don’t be like me and ignore keywording.  It’s a good thing to do.  But recall that I’m not to the point of doing any keywording in my post-processing because I haven’t weeded out the trash photos yet.  So far, I’ve only described the tool and where it’s located in LR3.

Directly below the Keyword panel is the Metadata panel.

This panel shows the major Exif data categories that many people are interested in for the image(s) that is highlighted.  Note that the “file name” shows “mixed.”  This is because I have 3 files highlighted.  If I had only one file highlighted, it would display the filename in this block.  None of the other categories say “mixed” because the metadata displayed is the same for all three images highlighted, where that is not the case for the filename.

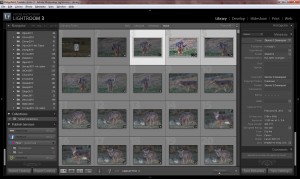
Take a close look at the small square gray box next to many of the category text fields for metadata.  The ones that have an arrow pointing to the right can be clicked.  By clicking the “live” icon next to the ISO400 text, the Library Filter is invoked and the center viewing area now displays Library statistics and also all images in the catalog that were shot at ISO 400.  Here is a screen shot.


You can see the statistics that are displayed at the top of the Grid View area due to the Library Filter being turned on.  This is a second example of how to invoke the Library Filter.  Viewing these from left to right, it shows the number of images I have in my catalog at the various ISO’s.  It indicates that I have taken shots at 17 different ISO speeds.  If I grab the scroll bar for the ISO list, I can see a list of all 17 ISO settings I have used and the number of photos taken with each one.  ISO 400 is by far my most used ISO at 20,000+ images.  The next category in the Library Filter shows I’ve used 3 different cameras and I’ve taken and cataloged about the same number of shots with each one, around 10,000+.  There are also lens and label category statistics.  So, there are some powerful database features in LR3 and a lot of ways to filter which images I want displayed, not to mention the ability to find images by keyword.

The final panel in the Library module on the right side of the screen is called Comments.  For all images that I have uploaded to Flickr using LR3’s Publish Service, LR3 downloads and displays comments made on these images and shows the favorite count.  I could even add a comment to the image on Flickr by filling in a text field at the top of the Comments panel in LR3 and the program would upload it.  I have not used this feature for commenting as I’m always on Flickr when I do that.  I also rarely comment on my own shots.

A couple of other buttons in the Library module are “Sync Metadata” and “Sync Settings,” located under the right-side panel area.  These buttons make it easy to copy either Metadata from one image to another or, many other images, or develop settings from one to any other image(s).  These are a great time saver.


The Develop Module Interface


Left side – Develop

In Develop mode at the top-left, the Navigator displays a small preview window of the currently highlighted image.  If I click on the image, a zoom box appears that can be moved around letting me see the corresponding zoomed part of the image in the large center image viewer.  The next panel in the Develop Navigator is the Lightroom Presets panel where presets that came with the program are listed.  These work much like ‘actions’ do in Photoshop.  There are also sections for additional third-party presets that I have downloaded on my own.

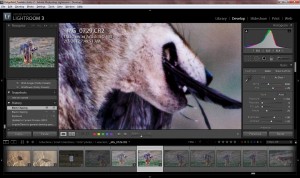
Here’s a screen shot of the Develop module with the zoom box invoked on the preview window at the top left of the screen.

The next panel moving downward in the Develop Navigator is the Snapshot panel.  I haven’t personally used this a lot but I can see where it could come in handy.  I can freeze or save an image after I have done adjustments to it with the idea that I can easily come back to that image state (or snapshot) at any time.  For example, say I’ve done some adjustments to an image that I like the looks of and I want to try some other enhancements to the image in LR3 but I don’t want to lose what I have done so far.  I can save a Snapshot and then continue trying other adjustments to the image knowing I can always revert right back to the image state saved as a Snapshot in case the new adjustments I tried didn’t turn out so well.

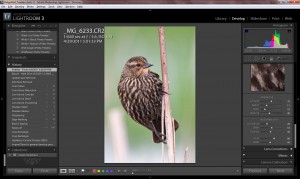
Below the Snapshot panel is the History panel.  This keeps track of each adjustment I do to an image, in the order I do it.  After a few minutes of working on an image, it will likely have a bunch of changes to it and they will be itemized here for the image that is currently highlighted and being worked on.  If I open the History panel so I can see its contents (each panel can be hidden or revealed), I can roll my mouse over the list of history adjustments and see how each one affects the image.  I view this in the small Navigator image panel window.  Plus, the same thing occurs if I roll my mouse over the list of presets (mentioned above) in the Navigator.  The small image viewer will display the selected image and what each preset will look like before I actually click on it.  In the screen shot below, I have closed the Navigator image viewer so I had room to display the entire history of adjustments to the selected Red-winged Blackbird (female) shot.

The first adjustments I did on the image are listed at the bottom.  You can see that “Dennis’s General Develop Preset” is the first change made to the image.  You’ll recall that this is one of my initial instructions I gave LR3 upon importing of my images on the Import screen.  The most recent (last) adjustment or action done on this image is that I uploaded it to Flickr using LR3.  This is shown at the top of the history list for this blackbird image.

The final panel in the Develop Navigator on the left is the Collections/Smart Collections panel.  This is the same tool I talked about above that is located in a similar place in the Library module.

Center – Develop module

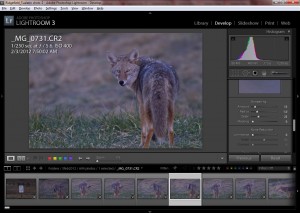
The center portion of the Develop module, as we’ve seen, has a large display of the image that is highlighted on the filmstrip at the bottom of the screen.  The information in white text at the top left of the center image is customizable and can be turned off.  I have customized LR3 to display the filename, shutter speed, aperture, ISO, date & time related to the selected image.  I happen to like seeing this information prominently displayed.

Let’s move down underneath the large image area in the center of the screen.  Here there is a horizontal tool bar that holds up to about ten tools.  Please refer to the above screen print which shows this tool bar.

Going from left to right, the first tool is the Loupe View icon.  The screen print below is set with this view.  The next tool has two Y’s beside each other.  Clicking this puts the image into a before and after format.  One box shows the image before adjustments and the other box shows the image after adjustments.  Most of the tools I described up in the Library module are available here if I choose to make them visible.  The triangle arrow icon (not shown but available) invokes an impromptu slideshow.  And lastly, the Zoom slider adjusts the zoom view in the main viewing window.

Right-side – Develop

Below is a screen shot of the Develop module.

Notice in the screen print above that on the left side, the Navigator panel has gone away and a larger image display has taken its place.  There’s a small triangle at the very left edge of the monitor that I can click which will toggle on and off the Navigator section.  I clicked it to toggle it off.  I find I don’t use the Navigator area as much in the Develop module and I prefer to have the image larger.  If I wanted, I could also hide the top portion of the screen, the right side, or the bottom (filmstrip) portion of the screen, which would make room for an even larger image display.  All I need to do is click on the respective edge triangle at those locations.  I normally just hide the Navigator section when I’m in Develop mode.  If I do want to try some presets on the image, one click on the left triangle will open the left panel back up.

The Develop mode, like the Library mode, also shows me the Histogram in the top right corner, which makes sense.  Directly under the histogram, LR3 displays Exif data, similar to what the Library mode does.  The difference is that the Exif data values for ISO, focal length, aperture, and shutter speed, only appear if my mouse pointer is on a filmstrip image. If I move the mouse pointer into the large image area above the filmstrip, the data shown under the histogram changes to RGB percentages, which I have to say I have not used.

Just underneath the Histogram is a small horizontal tool bar with a set of five icons called a Tool Strip.  Each icon represents a processing tool.  I use four of them a lot and one, just a little.  Let’s go through these one by one.

The rectangle with a dotted line around it is the Cropping tool.

The circle with the arrow pointing to the right is the Spot removal tool.  It acts like a simplified clone and/or healing tool.  I say simplified because it has its limitations–these tools in Photoshop are much more powerful and flexible.  But the Spot Removal tool in LR does a good job at removing spots just like it says.  Its usefulness is, many times, dependent upon the image and what needs to be fixed.

This next tool is the Red Eye Correction tool and has an eye for an icon.  This tool works well on human red eyes caused by flash photography.  But, with birds and animals, even with flash, I don’t usually get red eyes.  They’re always every other color but red!  External flash does a good job of eliminating red eye from people so I rarely need to use it there either.  Bottom line is I don’t use this tool much but it does work fairly well if it’s needed, especially if the eye is red.

The Graduated Filter tool is really cool.  It’s the icon with the rectangle that has a dark top half and a lighter bottom half.  This tool does wonders, not so much for bird pictures, but more for my family event shots I take using flash indoors.  Sometimes the flash will encounter a bright object in the foreground and try not to over expose that object, leaving the area that is further from the flash too dark.  This tool does a wonderful job fixing a situation like that and lightens up the underexposed area of the photo without causing the foreground to be overexposed.  Good stuff!

The Adjustment Brush tool is one of my most used tools for bird photos!  With it (in version 3), I can brush on adjustments to my RAW images for Exposure, Brightness, Contrast, Saturation, Clarity, and Sharpness.  It looks like the upcoming version 4 will be adding, Highlights, Shadows, Noise, and Moire to the adjustment brush tool.  This will make it even better.

Below this horizontal tool palette is a Basic panel showing all the basic adjustments that can be made to an image.  There’s a slider to control the amount for each one.   Alternatively, I can type a numeric value into the box to adjust the control  Note that in the screen shot below, we’re still on the Develop module but I have hidden the Histogram temporarily and I’ve also hidden the filmstrip at the bottom of the screen.  I did this so you could see more of the right-hand panel and its controls.  Click on the image to see a larger more clear view of the screen shot.  There are about a dozen different basic controls I can use to change the image I’m working on.  I’ll try to show you how I use these on a “typical” image a little later on when I actually pick an image and go through my workflow process.

Just below the Basic adjustments panel is the Tone Curve panel, which is very similar to the Curves tool you can use in Photoshop or many other advanced image editors.  And below that, is the HSL/Color/B&W panel where you can individually adjust color hue, saturation, and luminance for any of eight different colors.  It even has a B&W mix that I have not used as of yet.  Under this is the Split Toning panel.  Here you can vary color hue and saturation separately for highlights and for shadows.


Next, is the Detail panel.  This is where I sharpen images and remove noise.  It works really well, especially if the background of your image is a completely different color/texture than your subject.  It has a masking tool that does a pretty good job of separating an uncluttered background from the bird so that noise reduction doesn’t negatively impact the bird as much.  As I touched on earlier, version 4 of LR will have an adjustment brush, in addition to this tool, to selectively make noise level adjustments which I would think could be used in tandem with the Detail panel tools.  So that will be a nice addition to LR4.

We’re still describing the tools available on the right side of the screen in Develop mode for LR3 and we’re almost done.  The next panel located under the Detail panel is Lens Correction.  I haven’t used this tool but I can see how it could help photographers who shoot landscapes and some other genres.  The user basically tells LR3 what make and model lens they have and LR3 automatically corrects the image for imperfections like distortion, aberration, and vignetting.  In bird photography, I normally crop off so much of the image that any imperfections go out with the crop.

The next panel is the Effects panel, used to add post-crop vignetting and grain texture to images.  Again, I don’t use these much but for other genres of photography they could be very useful.

And last is the Camera Calibration panel, which lets me calibrate my specific camera’s color output to LR3.  I have not used this feature yet and I’m not sure how necessary it is for wildlife photography.  I’m the first to admit that I don’t know it all and there may be features of the program that I haven’t taken advantage of yet but should.

This concludes my description of Lightroom 3 and how I import images from my CF card.  In the next article, I will be using many of the tools and features I described above to process some images using LR3.  In addition, I’ll take some of the images into Photoshop, and Color EFEX Pro 4 for further enhancement, step by step.  Looking forward to it!


<<Previous Article                                                                                     Next Article >>

Bird Photography Equipment (1)

DSLR Features for Bird Photography (2)

Memory Cards for Cameras (3)

Lenses for Bird Photography (4)

Bird Photography Accessories (5)

Tripod or Monopod? (6)

More Accessories for Bird Photography (7)

Software Introduction for Bird Photography (8)

Introduction to Capturing Bird Images (9)

JPG or RAW? (10)

Shooting Bird Photos (11)

Camera Exposure Modes (12)

Other Camera Settings and Features (13)

Exif Data (14)

Depth of Field and Aperture (15)

Best Time to Photograph Birds (16)

Composition in Bird Photography (17)

Getting Close in Bird Photography (18)

Backgrounds in Bird Photography (19)

Using External Flash in Bird Photography (20)

Photographing Birds in Flight (21)

Processing Images in Lightroom 3 (23)

Processing Images in Lightroom 3 (24) 

From Lightroom to Plugins (25)

Using Lightroom to Upload Images (26)


4 thoughts on “Lightroom 3 – The Hub of My Workflow, Part 22”

  1. Papa, you’ve written such an informative, comprehensive series! Love this latest installment and I’m particularly fond off your use of screenshots. It really helps the reader understand what they’re reading! GOOD STUFF. 🙂

  2. I like the photos! As a professional photographer I am aware it is usually difficult to find the best shots but these are excellent.
    I prefer several Lightroom presets to keep some consistency with my own.

Leave a Reply to Kim Orth Cancel Reply

Your email address will not be published. Required fields are marked *

My Gear:

  • Canon EOS 5D Mark IV & Grip
  • Canon EOS 7D Mark II
  • Canon EF 500mm f4L IS II
  • Canon EF 24-105mm f4L
  • Canon EF 50mm f1.8
  • Canon 1.4X III Extender
  • Canon 2x III Extender
  • Canon 580EX Flash
  • Zoom H1 Recorder
  • Better Beamer
  • Manfrotto tripod/monopod
  • Manfrotto Gimbal Head
  • Sandisk Compact Flash Cards
  • The Molar Bean Bag by Vertex
  • Joby Gorillapod Focus & Ballhead
  • Canon EG200 Backpack
  • Storm Jacket Camera Cover
  • Kinesis Safari Sack
  • Original Bug Shirt Elite Edition

Software:

  • Adobe Photoshop CC
  • Adobe Photoshop Lightroom Classic
  • Nik Color EFEX Pro 4
  • Nik Sharpener 3
  • Nik Dfine 2.0
  • Nik Viveza 2
  • Nik HDR Efex Pro 2
  • Nik Silver Efex Pro 2
  • Nik Analog Efex Pro